Steps and excel template to import string
Path: Manage Workspace >> Customization >> Language and Strings >> Import Strings.
Path: Community Topbar >> Apps icon >> Community Settings >> Customization >> Language and Strings >> Import Strings.
The Import Strings feature enables both the admins to seamlessly import translations and customized strings through a single Excel sheet upload. To begin, simply export the strings that require updates. This functionality can be utilized by the workspace administrator, applying changes across the entire workspace, or by community administrators who can tailor the strings to meet the specific needs of their community.
Steps to Import Strings:
1. Export Strings - Admin first need to export the strings. Help article on Export strings
Once they have exported it, the exported Excel will look like the screenshot below:

-
In the column 'Strings', string will be shown, e.g. application.ideascale.ml.6.digit.code.
-
In the column 'English Text', the original text will be shown, e.g. 6 digit code.
-
In the column 'English Unverified', only the customized text will be shown, e.g. 6 digit code customized.
-
In the column 'Customized/Verified', no data will be shown. It is intentionally kept empty so that the user can insert/add a new value to import/upload preferred customized text.
Export strings feature is provided with an ability to download a template for importing strings.
2. Update or customize the strings in the excel you have generated - In the exported file, update the last column Customized/ Verified.

Workspace/Community admin would require to update only the last column with the changes. The above sheet exported was for the language English and so has third column as English Unverified. If it was another language for example Spanish the sheet would reflect like the screenshot below.

Admin can customise either all the strings or any strings of your choice. There is no restriction on how many strings needs to be customised.
3. Import the Strings
When the sheet is ready select the Language in which the import has to be done and upload the file and click on Save. A message will on top of the screen "Languages and Strings were imported successfully "
4. Receive email notification after the import.
On completion of the import the administrator will receive an email notification regarding the success of the import.
- Since we recently stopped supporting HTML , strings containing HTML will NOT be imported .
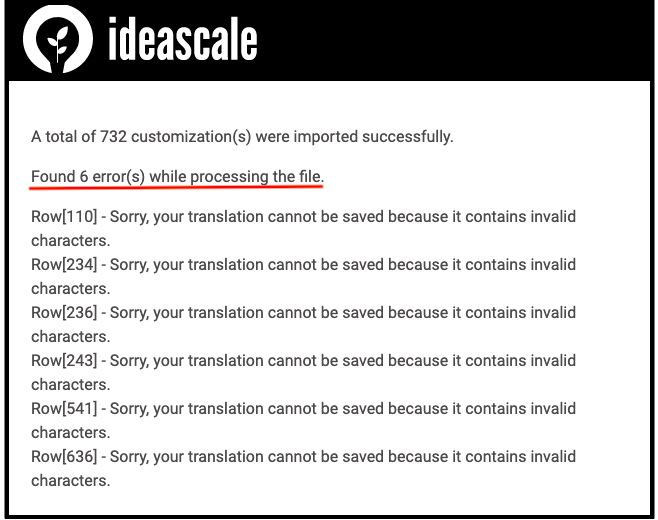
- The import the email notification will mention the excel sheet row number of the strings which were not uploaded, as seen in the screenshot below.
- Please refer to the excel sheet and copy the string which was not uploaded .
For eg. got to Row no. 110 of the excel sheet and copy the string , Search for the string from Language and Strings Section. - Update it and Save.
In case there is an error admin should receive an email notification with the errors specified in it.

The customized strings will now show the Customized checkbox checked and with the new updation in the box. In the below image the strings were updated in Spanish language.
