IdeaScale Whiteboard Canvas
Creating, navigating, using the tools and collaborating with users on the board
Path: Community Topbar >> Apps Icon >> IdeaScale Whiteboard >> Dashboard
Creating a new board
To create a new board, simply navigate to the dashboard or select a folder and click on the "New Board" button. You have the option to start with a Blank Template or explore a variety of available pre-made Templates to suit your needs. 
Note: Users accessing the free version of IdeaScale Whiteboard will be limited to 3 options of pre-made templates
Navigating the board
Navigating the board is intuitive, regardless of whether you prefer a touchpad or a mouse. If you're using a touchpad, you can easily pan across the screen by swiping with two fingers and zoom in or out by pinching. For mouse users, select the hand tool from the toolbar at the bottom to click and drag the board. Alternatively, you can right-click and drag to navigate as well. To zoom in and out with a mouse, simply hold down the Control key while scrolling. For your convenience, zoom buttons and a board map are available in the bottom right corner of the screen, making navigation even easier if you find these controls challenging to use.
To go back to the Main dashboard click on the IdeaScale Whiteboard logo next to the Board name.
Elements on the board (Board Tools)
The elements on the board tools are strategically arranged to facilitate easy creation, updates, and collaboration among users.
The first element is the board's name, which can be edited by double-clicking on it. Additionally, the "More" option provides functionality to export the board as a sticky note and includes a delete feature.
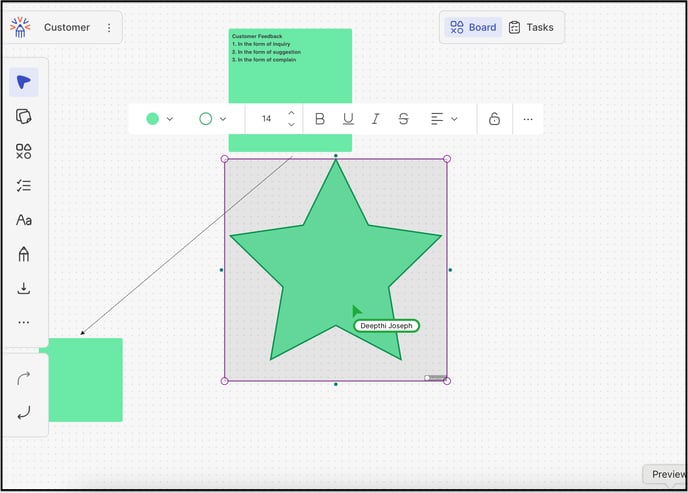
The second element is the Tool Bar, located on the left side of the board. This bar provides access to various tools that enable you to effectively customize and organize the board, enhancing the collaborative experience for all users involved.
- Move: It allows to move elements (text, shapes) within the board. Click on the element to be moved and drag it around the board to reposition.

Upon selecting the element, the editing options will appear for background colour fill, border, font size, font style (bold, italicise, underline and strikethrough), indent, position lock and more (3 dots). More (3 dots) option further has Copy, Duplicate, Position lock, Delete, Bring to Front, Send to Back, and Export as image & PDF.
- Notes: This option adds sticky notes to the board. It also has editing options available similar to Move option.
- Show Shapes: Adds different shapes like Resctangle, Circle, Triangle, Diamond, Rounded Rectangle, Star, Arrow and Stickers to the board. It also has editing options available similar to Move option.
- Show Task: Allows to choose the tasks created for the specific board and add them within the board by selecting the task from the dropdown and clicking on any place on the board to place it.

Once placed, click on the task to see the edit options like navigate to task manager, lock position and more (3 dots) option. More (3 dots) option further has copy, duplicate, position lock, delete, and export as image & PDF. - Text: Adds a text element within the board. It also has editing options available similar to Move option.
- Draw: Allows to draw on the board using Pen or Marker option. It also has editing options available similar to Move option.
- Redo: Allows to redo the latest deleted or edited item.
- Undo: Allows to undo the latest deleted or edited item.
The third element is located in the upper right corner of the board and includes four essential tools: Show Collaborators, Live Chat, Share This Board, and Help Resources explained in Board Management Options.
The fourth element Board Control provides options like a hand icon to move across the board effortlessly to explore different areas, zooming in and out, a board map as well as the ability to toggle the board to full-screen mode for an immersive viewing experience.
Board Management Options
In the top right of the sidebar, there are Sharing, Collaborators, Live Chat, Help, and Export that users can select to manage and explore the board.

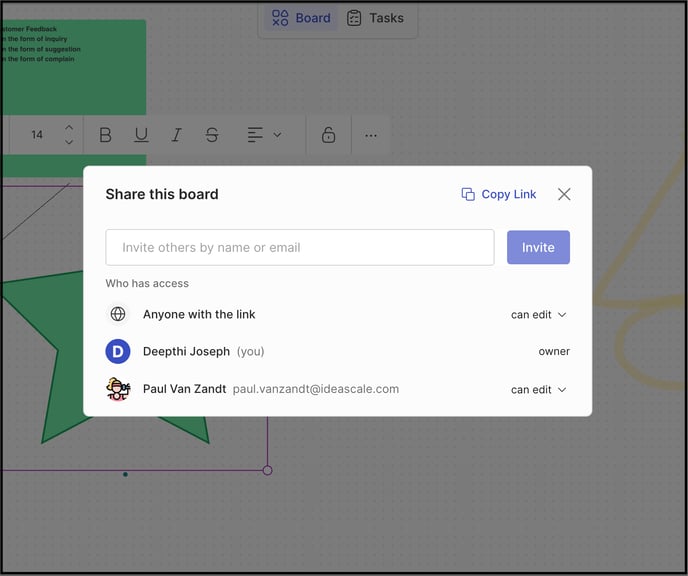
Share this board: The "Share This Board" feature allows users to share the board with others through email or by providing a sharing link. In this section, members can also set specific permissions, granting individuals or groups the ability to either edit the board or view it only. When you share the board using the sharing link or by sending it via email, only those members who have access to the associated Campaign will be able to view it. In the case of public campaigns, this includes all community members, whereas for private campaigns, only those individuals granted access will be able to participate.

Collaborators: The Collaborators tab displays a list of all participants currently active on the board. By clicking on the board you will be able to see if any collaborator is active on the board.
Live Chat: The Live Chat feature provides a real-time messaging platform for participants on the board, allowing them to discuss and exchange ideas relevant to their collaborative efforts.
Help & Resources: The help page has multiple pieces of important information allowing members to more effectively navigate and understand the board. Here are the different sections of the help menu: Shortcut List, Quick Guide and Take a Tour.
Shortcut List: When you click on Help & Resources, a page will open that provides a comprehensive list of shortcuts for utilizing various tools on the board, as well as navigation, zooming, selection, and text editing functions.
Quick Guide: This section provides an overview of all the tools, controls, and actions accessible within the board, ensuring that users can effectively leverage the platform's capabilities.
Take a tour: This feature provides members with a guided tour that walks them through the various steps and functionalities available within IdeaScale Whiteboard.
Last Updated: September 22, 2025