Customizing Language and Strings
Steps to customize strings
Path: Community Topbar >> Apps Icon >> Community Settings >> Customization >> Languages & Strings
IdeaScale's Languages & Strings tool offers a unique feature for translation and customization of your community's text. Using this tool, you can change your community's default English language to any language of your choice. With this same tool, you can also customize every string of your English or translated language to read as you wish. Prefer the word "Category" to our default "Campaign"? Want to personalize the language of your notification emails? It's all done within Languages & Strings.
How do I change the strings using different community languages?
Following the steps given below, you can change the strings as per your language choice-
1) Log in to your IdeaScale community as the community's Administrator. From the dropdown on the top right-hand corner select Community Settings >> Customization >> Language & Strings
Note: Only Administrators can edit Languages & Strings.

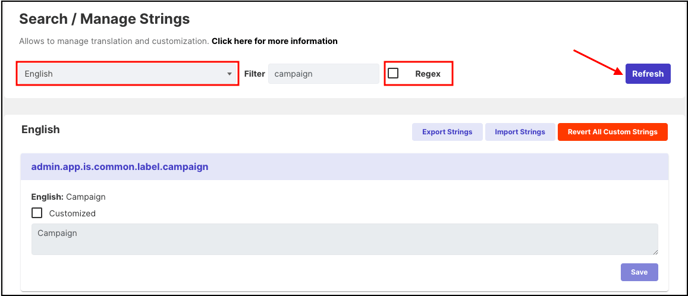
2) Choose the language of your choice, select from the dropdown available the language of your choice for all notifications.
3) Enter the words in the search box you want to customize and click on the 'Refresh'.

4) Then customize your strings by checking the 'Customized' checkbox, modifying the string, and after modifying click on 'Save' button:

Note:
- You need to refresh your browser to see the changes.
- Strings with HTML tags cannot be updated.
Last Updated: September 24, 2025