Overview of the various campaign settings
Path: Community Settings >> Campaign >> Manage Campaign
The Campaign Settings panel is where the admin can add, edit, or delete campaigns and campaign groups. They can also change the order of campaigns from here.
1 . Campaign Management
2. Campaign Creation/Editing

Toggling the switch to Basic displays the following tabs in the Update Campaign section.
c. Moderation
d. Funnel
e. Schedule
Toggling the switch to Advanced displays the following tabs in the Update Campaign section.
1. Campaign Brief
3. Archived Campaigns
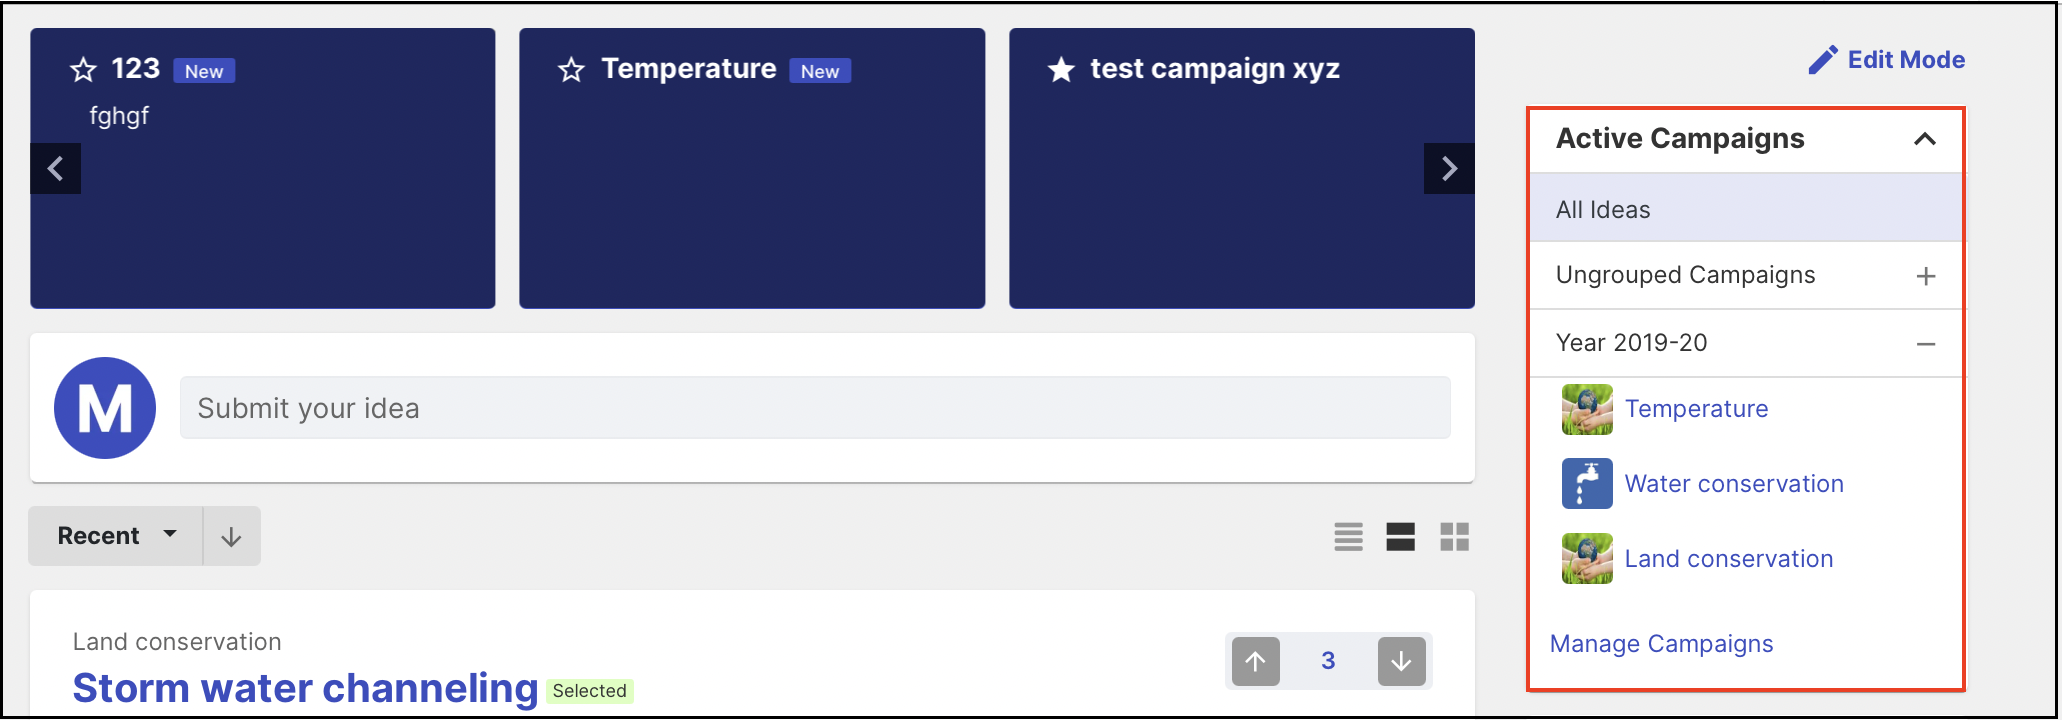
A campaign serves as a designated category or container for ideas contributed by organization members, facilitating easy sorting by subject matter within your community. Use cases for campaigns encompass various aspects such as business functions (Sales, Marketing, Manufacturing, etc.), geographical regions (Northeast, Mid-Atlantic, Southeast, etc.), or idea types (Productivity Ideas, Fun Ideas, Profit Ideas).
The campaigns show up on the right side of the portal as seen in the screenshot below.
Campaign Management
1) Search: The search filter helps to search for campaigns by campaign group name, campaign title, and campaign description. It also searches with only part of the name if you are not sure about the name.
2) Add Campaigns: When setting up an IdeaScale community, 3 sample Campaigns are automatically created. Through 'Manage Campaigns' on the right navigation panel on the homepage as well as from Community settings, the administrator can easily add campaigns and new campaign groups.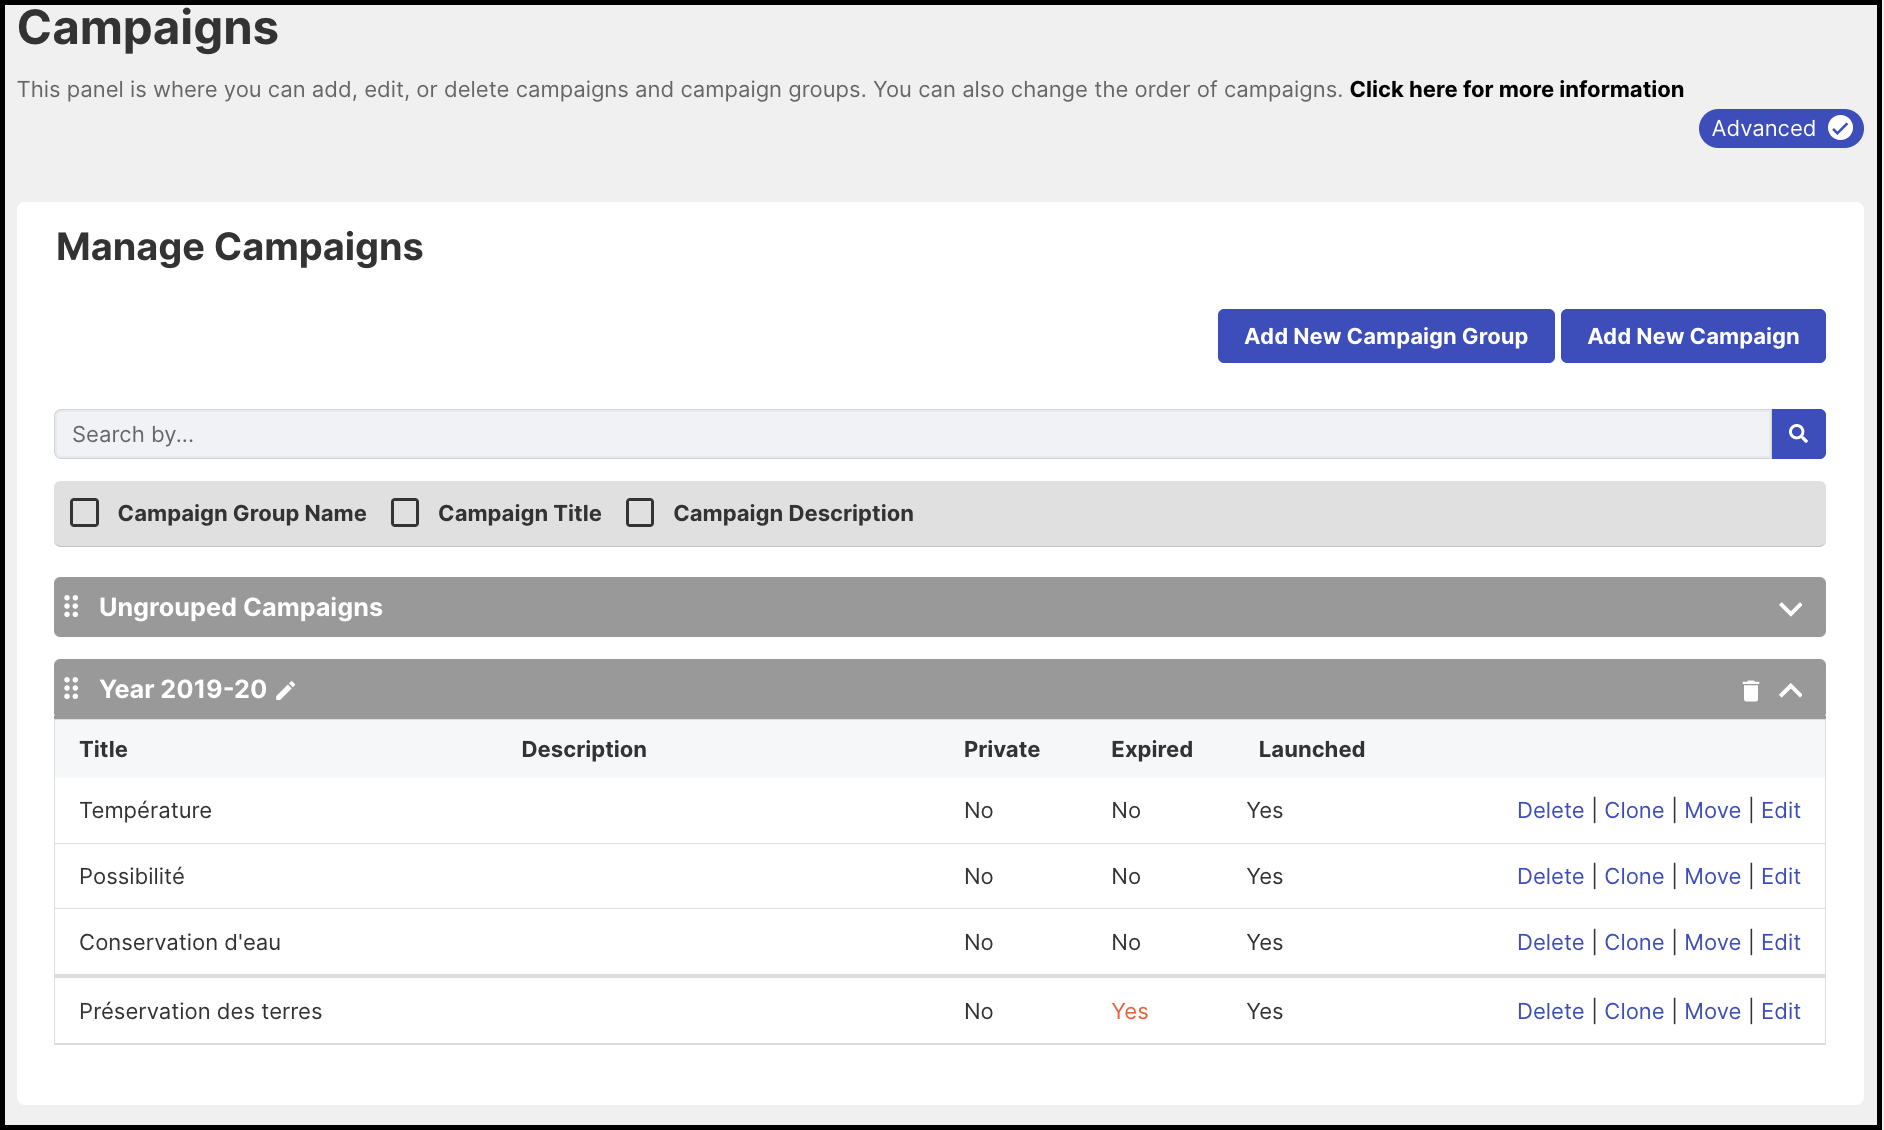
3) Add New Campaign Group: Adding a campaign group helps to group all the related campaigns under one section for better operation and control of the campaigns. Campaign Groups can be reordered (Six dots), edited (Pencil icon), or deleted (Trash can icon).
4) Edit: Campaigns, as well as their groups, can be edited or deleted by clicking on the respective links on the right side of the campaign name in Community settings. You can edit them even when they are active. You can use basic HTML codes within the campaign description which follow the same validation rules as Site HTML.
5) Move: To arrange the campaigns in the desired order simply drag and drop them.
6) Delete: You can delete them by clicking the 'Delete' link, though once deleted all the ideas or questions within will be deleted as well and moved to the 'Recycle Bin' or deleted permanently as per the settings enabled by the admin in the Look & Feel section.
7) Clone: To prevent the hassle of recreating a campaign with similar settings as an existing campaign, admin can use the Clone option. To learn more about campaign cloning click here.
8) Reorder: It is possible to reorder the campaigns as well as campaign groups by simply dragging them up and down. The reordering will be reflected on the frontend/homepage too.
Campaign Creation/Editing
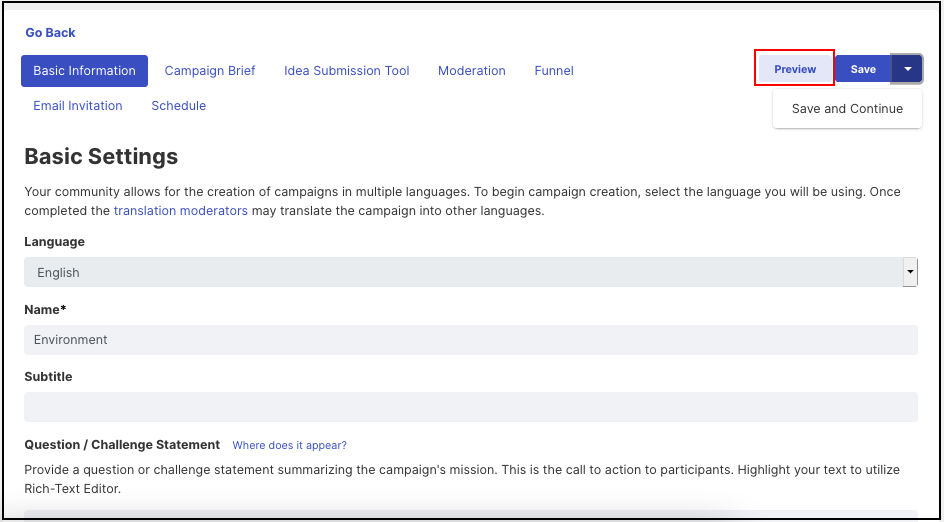
Campaign Preview: Once a campaign is created with a few details we have a 'Preview' button on the right side allowing administrators to have a glimpse of the campaign on the homepage while in draft mode.
1. Basic Information
The first section includes Basic information about the campaign.
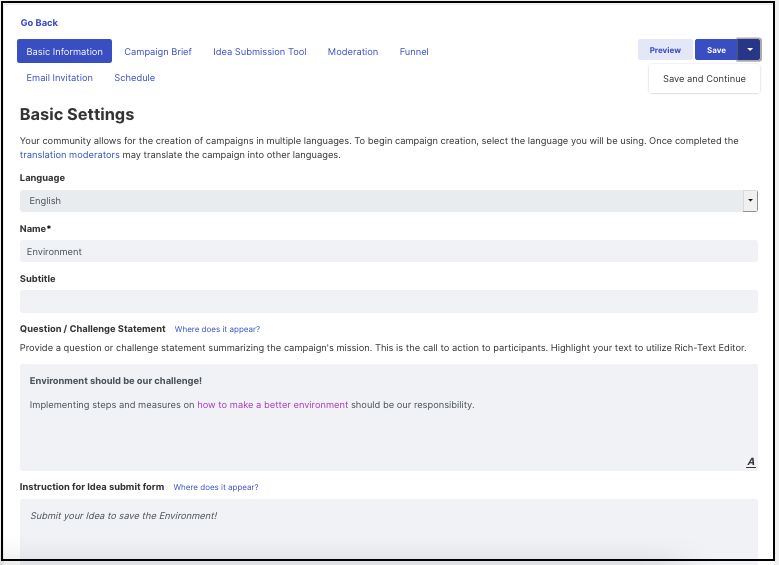
a. Basic Settings
- Language: The Language of the campaign depends upon the language of the community set up by the administrator.
Note: The language selection only will only appear during campaign creation. It cannot be changed once the campaign is created. - Name: A name has to be specified for the campaign.
- Subtitle: You can add a text or line which will show just below the Title of the campaign.
- Question / Challenge Statement: Providing a question or challenge statement summarizing the campaign's mission will attract the members to participate in the campaign.
- Instructions for Idea Submit form: This section allows you to put down any instructions for the members which would be visible in the Idea submission form.
- Campaign Group: If the community has created different campaign groups you could select a specific campaign group. If not the campaign will be moved to the Ungrouped campaign section of the community.
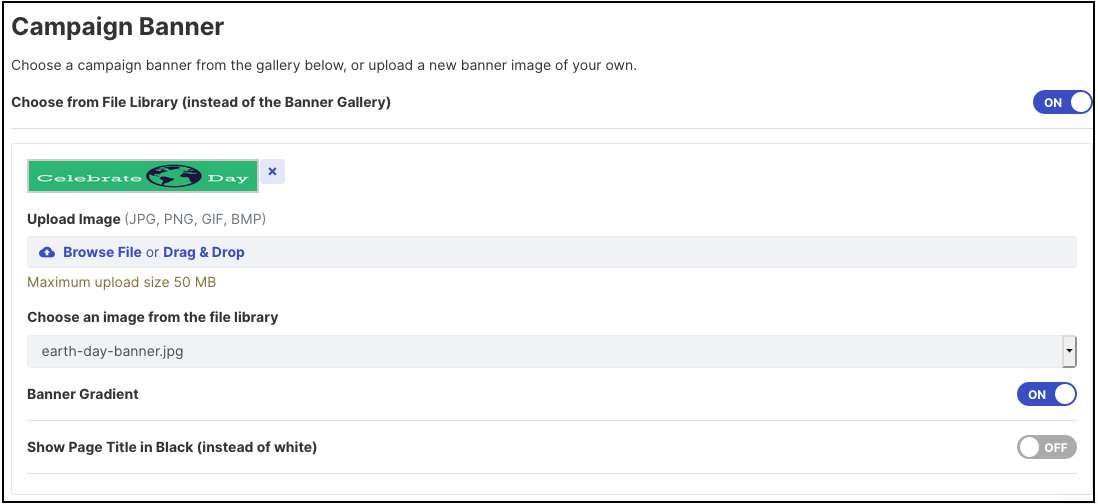
b. Campaign Banner:
Every campaign can be set up with a custom banner image. You will be able to see this on that campaign's pages.
Admins can drag and drop the images from the computer or choose an image that is already uploaded in the file library, you need to enable the setting 'Choose an image from the file library. In case you wish to revert to a default selection this can be done easily by clicking the link below the images.
The uploaded images can be resized and readjusted using the resizer. Help article on mage resizer: https://help.ideascale.com/knowledge/image-resizer
There are also options to give a gradient to the banner as well as show the Page titles in Black instead of White if they are not prominent on the selected banner.
Note: The campaign banner image will be set as an email banner for all the emails sent out related to that campaign.
c. Campaign Logo:
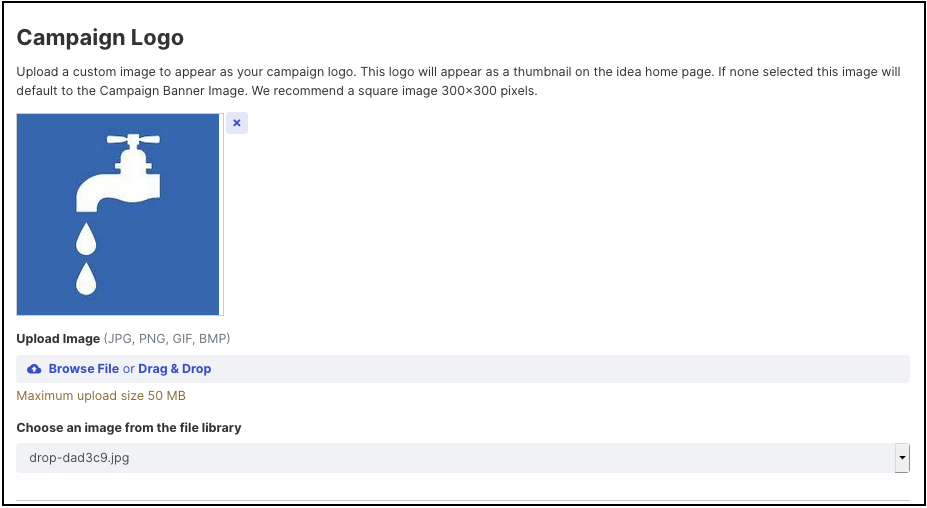
The campaign logo can be uploaded simply using the drag and drop option or choose an image from the file library if it is already uploaded there. The recommended size is 300 x 300 pixels. This logo will appear on the homepage as a thumbnail next to the campaign name. In case there is no logo (i.e. community, campaign) set then-campaign thumbnail logo will be the random image from the default selection.
Supported file formats for campaign banner or logo are JPG, PNG, GIF, and BMP.
Note: In case there is malicious content, virus, or malware during the upload it will show an error and the upload will fail.

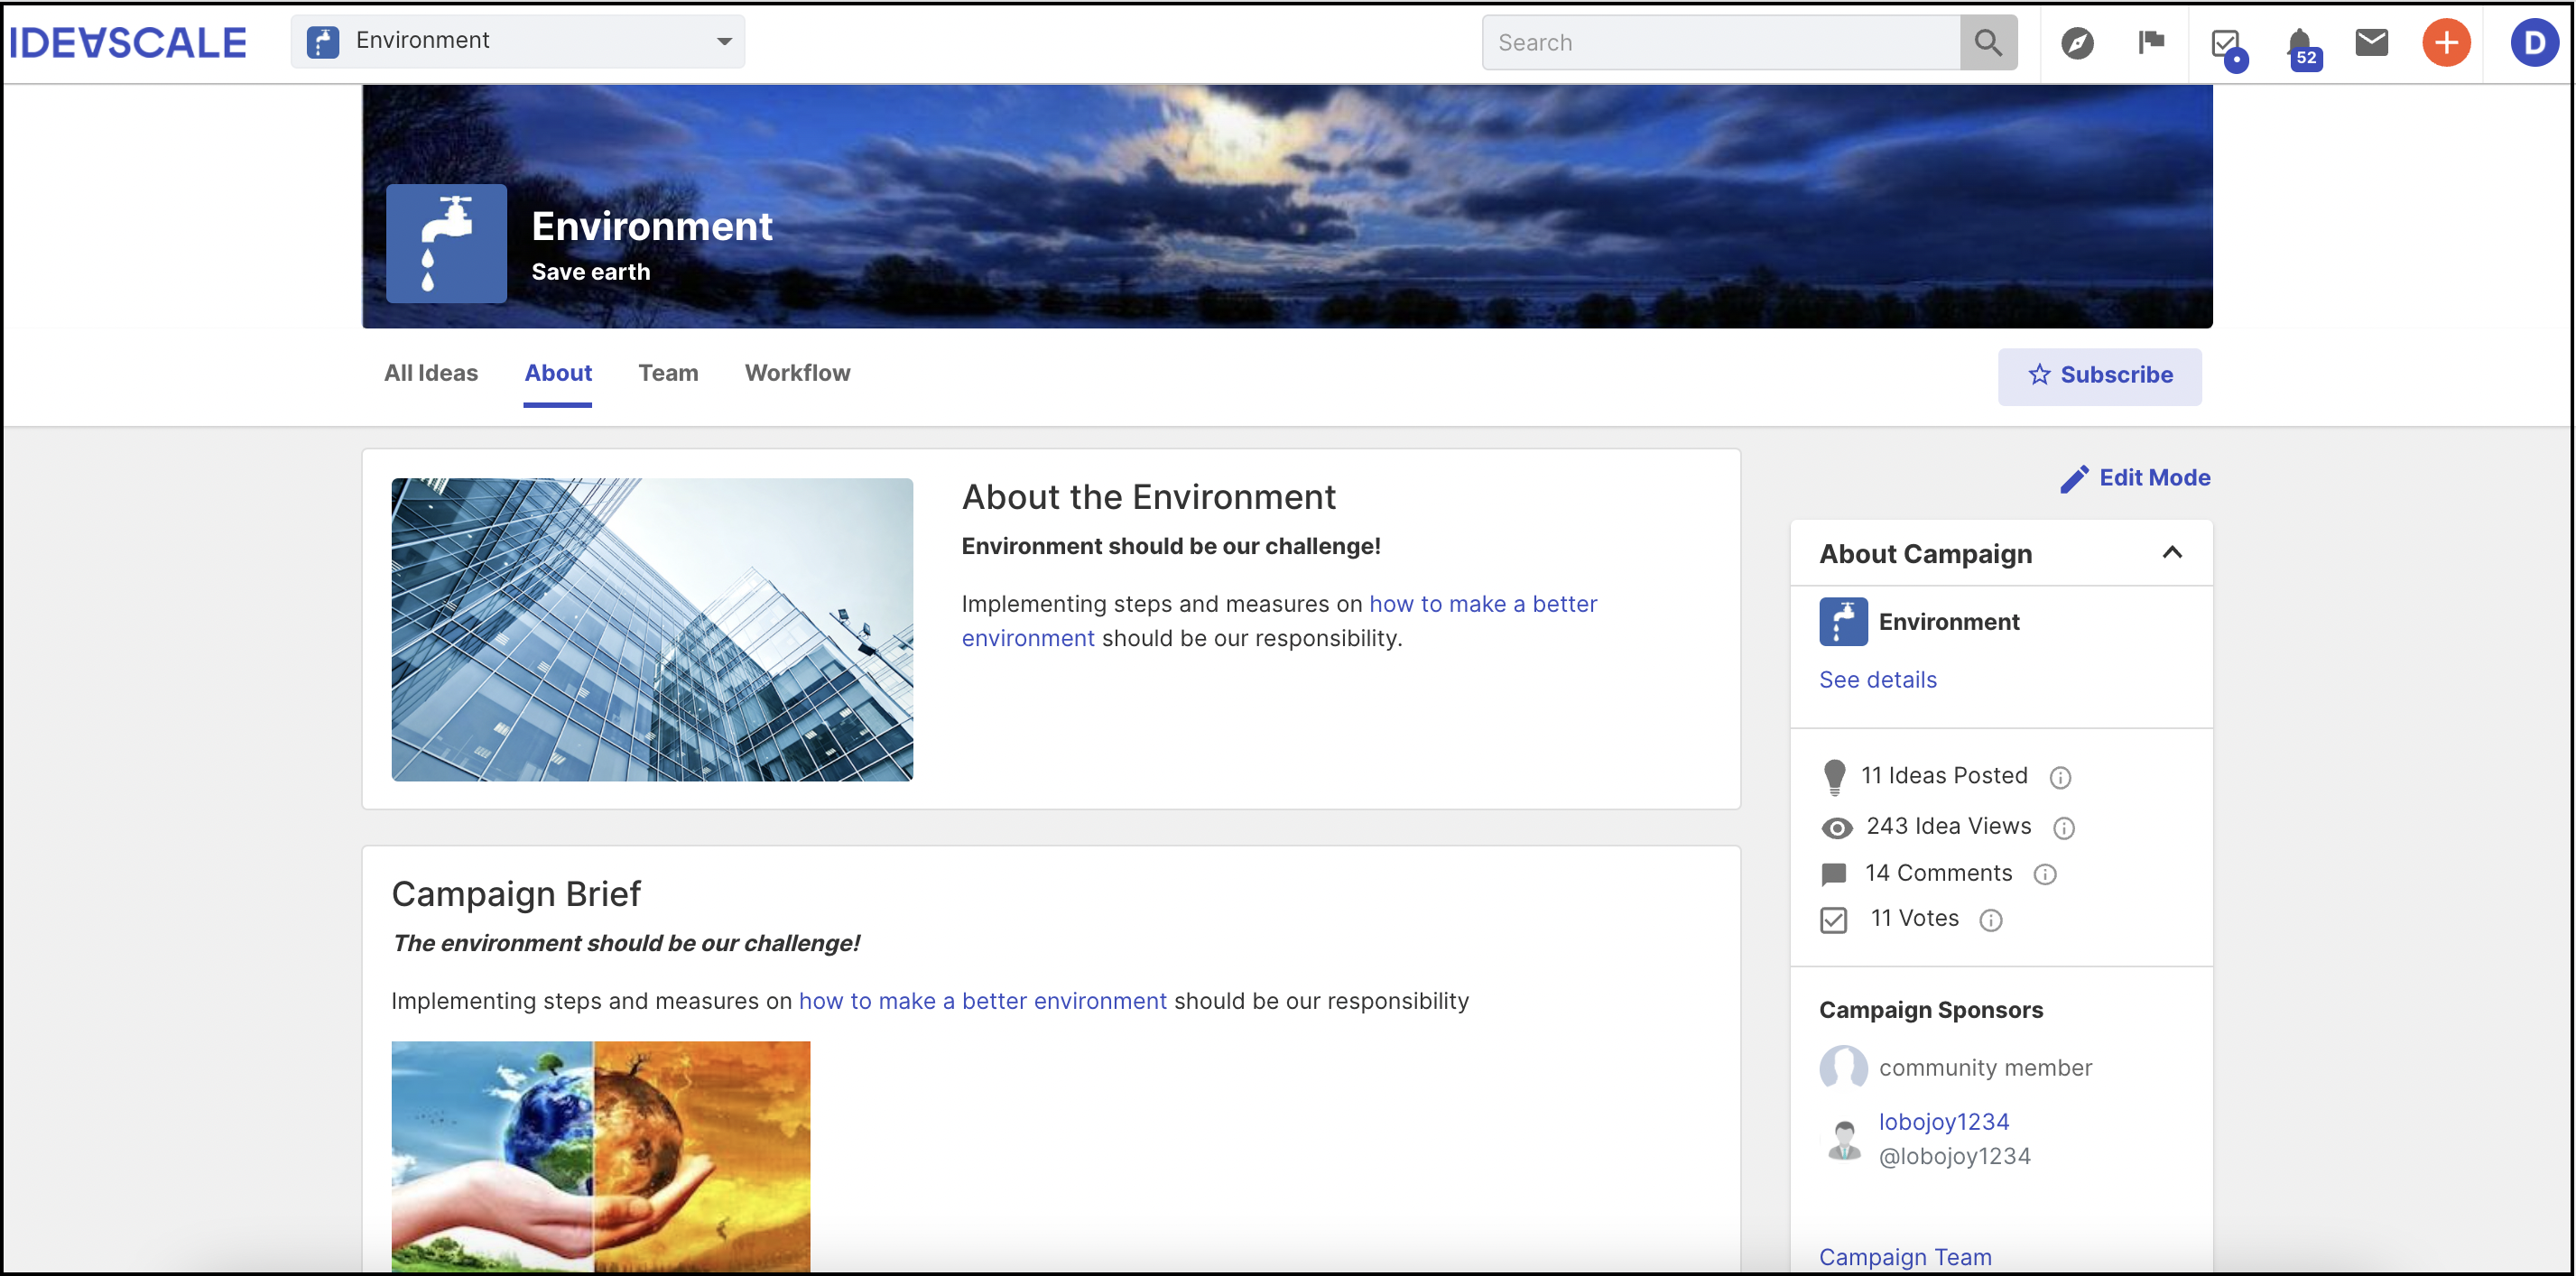
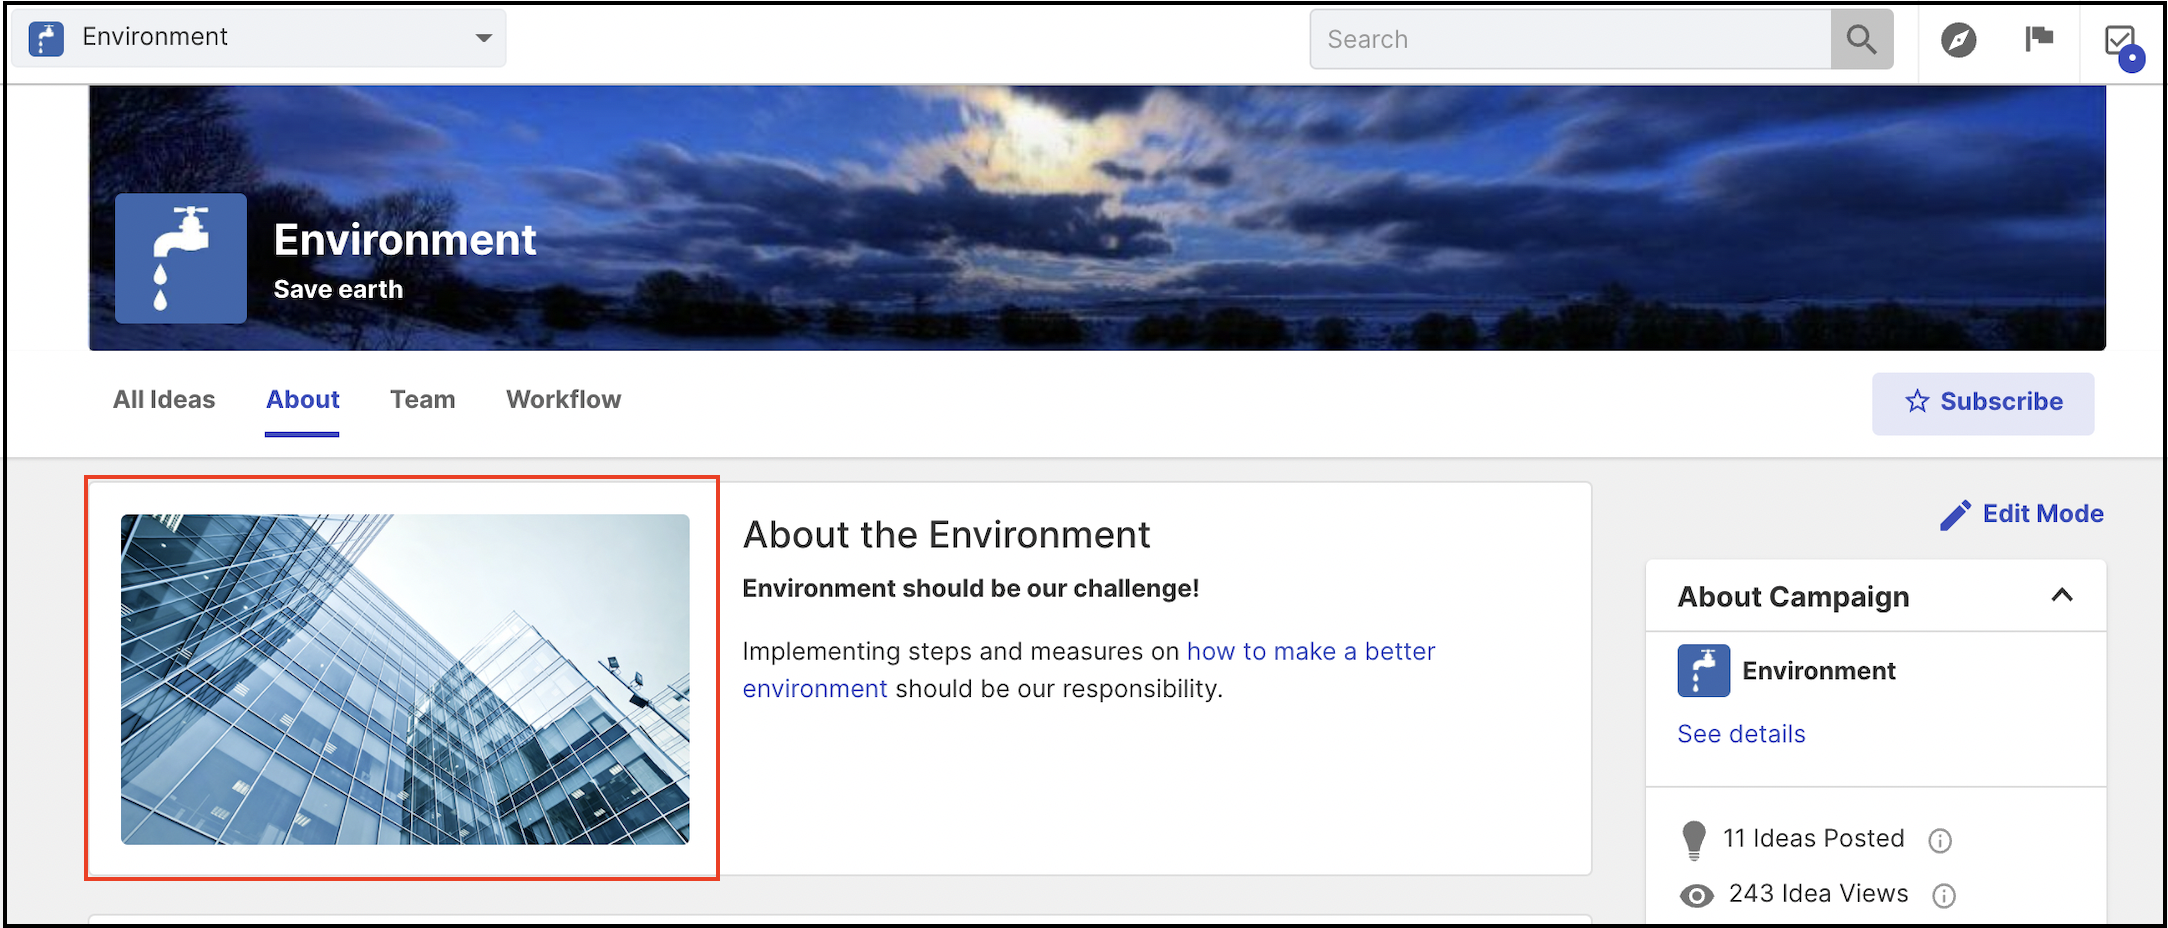
d. Campaign Featured Image
The campaign featured image is the visual representation of your campaign. It is recommended to use a square image with dimensions of 690 x 518 pixels.
Admins can drag and drop the images from the computer or choose an image that is already uploaded in the file library, you need to disable the setting 'Choose an image from the gallery. In case the admin wishes to revert to a default selection this can be done easily by clicking the link below the images. We also support animated GIFs!
The campaign feature image will be displayed on the home page in the About tab as well as in the Campaign invitation email that is sent to the users.

Note: Apart from Basic info tab, the campaign name, campaign subtitle, banner, logo, featured image, and challenge statement can be changed from frontend using Edit mode.
e. Behaviors and Permissions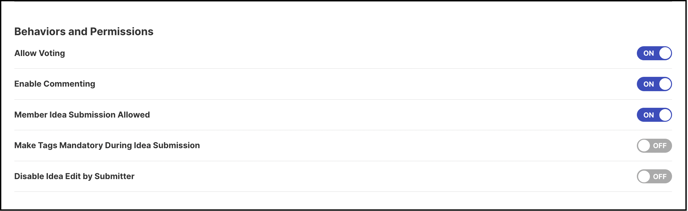
- Allow Voting: Enabling this will allow the members to start voting for ideas in this campaign.
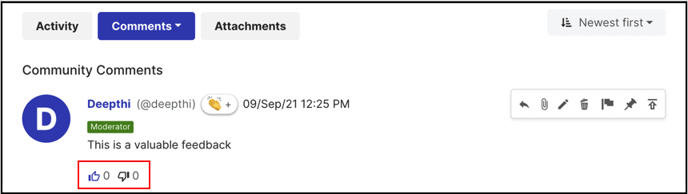
Note: If voting is disabled for the entire community it will override 'Voting Allowed' for a specific campaign.
When voting is disabled it also disables voting on comments as pictured below.
- Enable Commenting: This setting allows us to enable commenting in any specific campaign.
- Member Idea Submission Allowed: The administrator has to enable this setting for members to submit ideas in a campaign.
- Make Tags Mandatory During Idea Submission: When ON, it's compulsory to tag the ideas and the admin will not be able to remove the Tags section from Idea Submission Tool.
- Disable Idea Edit by Submitter: Enabling this will not allow the Idea submitter to edit Ideas in a specific campaign when sometimes editing ideas from a different campaign would be possible.
f. Privacy and Access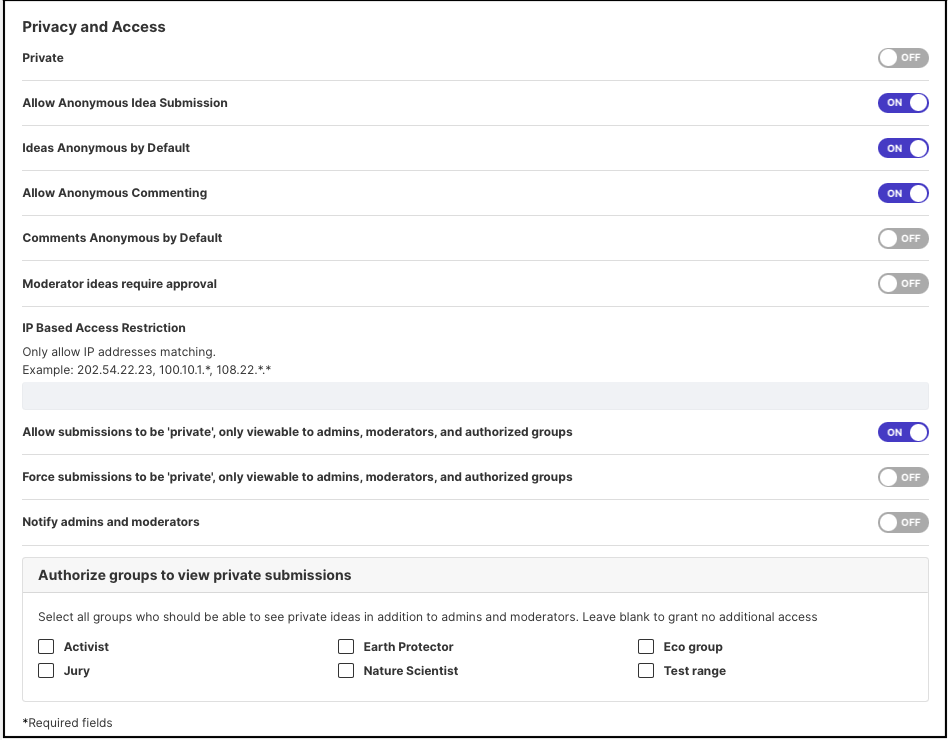
- Private: Enabling this will set your campaign as private thus offering access to selected users only. Click here to learn more.
- Allow Anonymous Idea Submission: This feature enables the users to submit ideas anonymously in the specific campaign while in the rest of the community, user names will still appear. An option 'Submit Idea Anonymously' will be visible in the idea submission form.
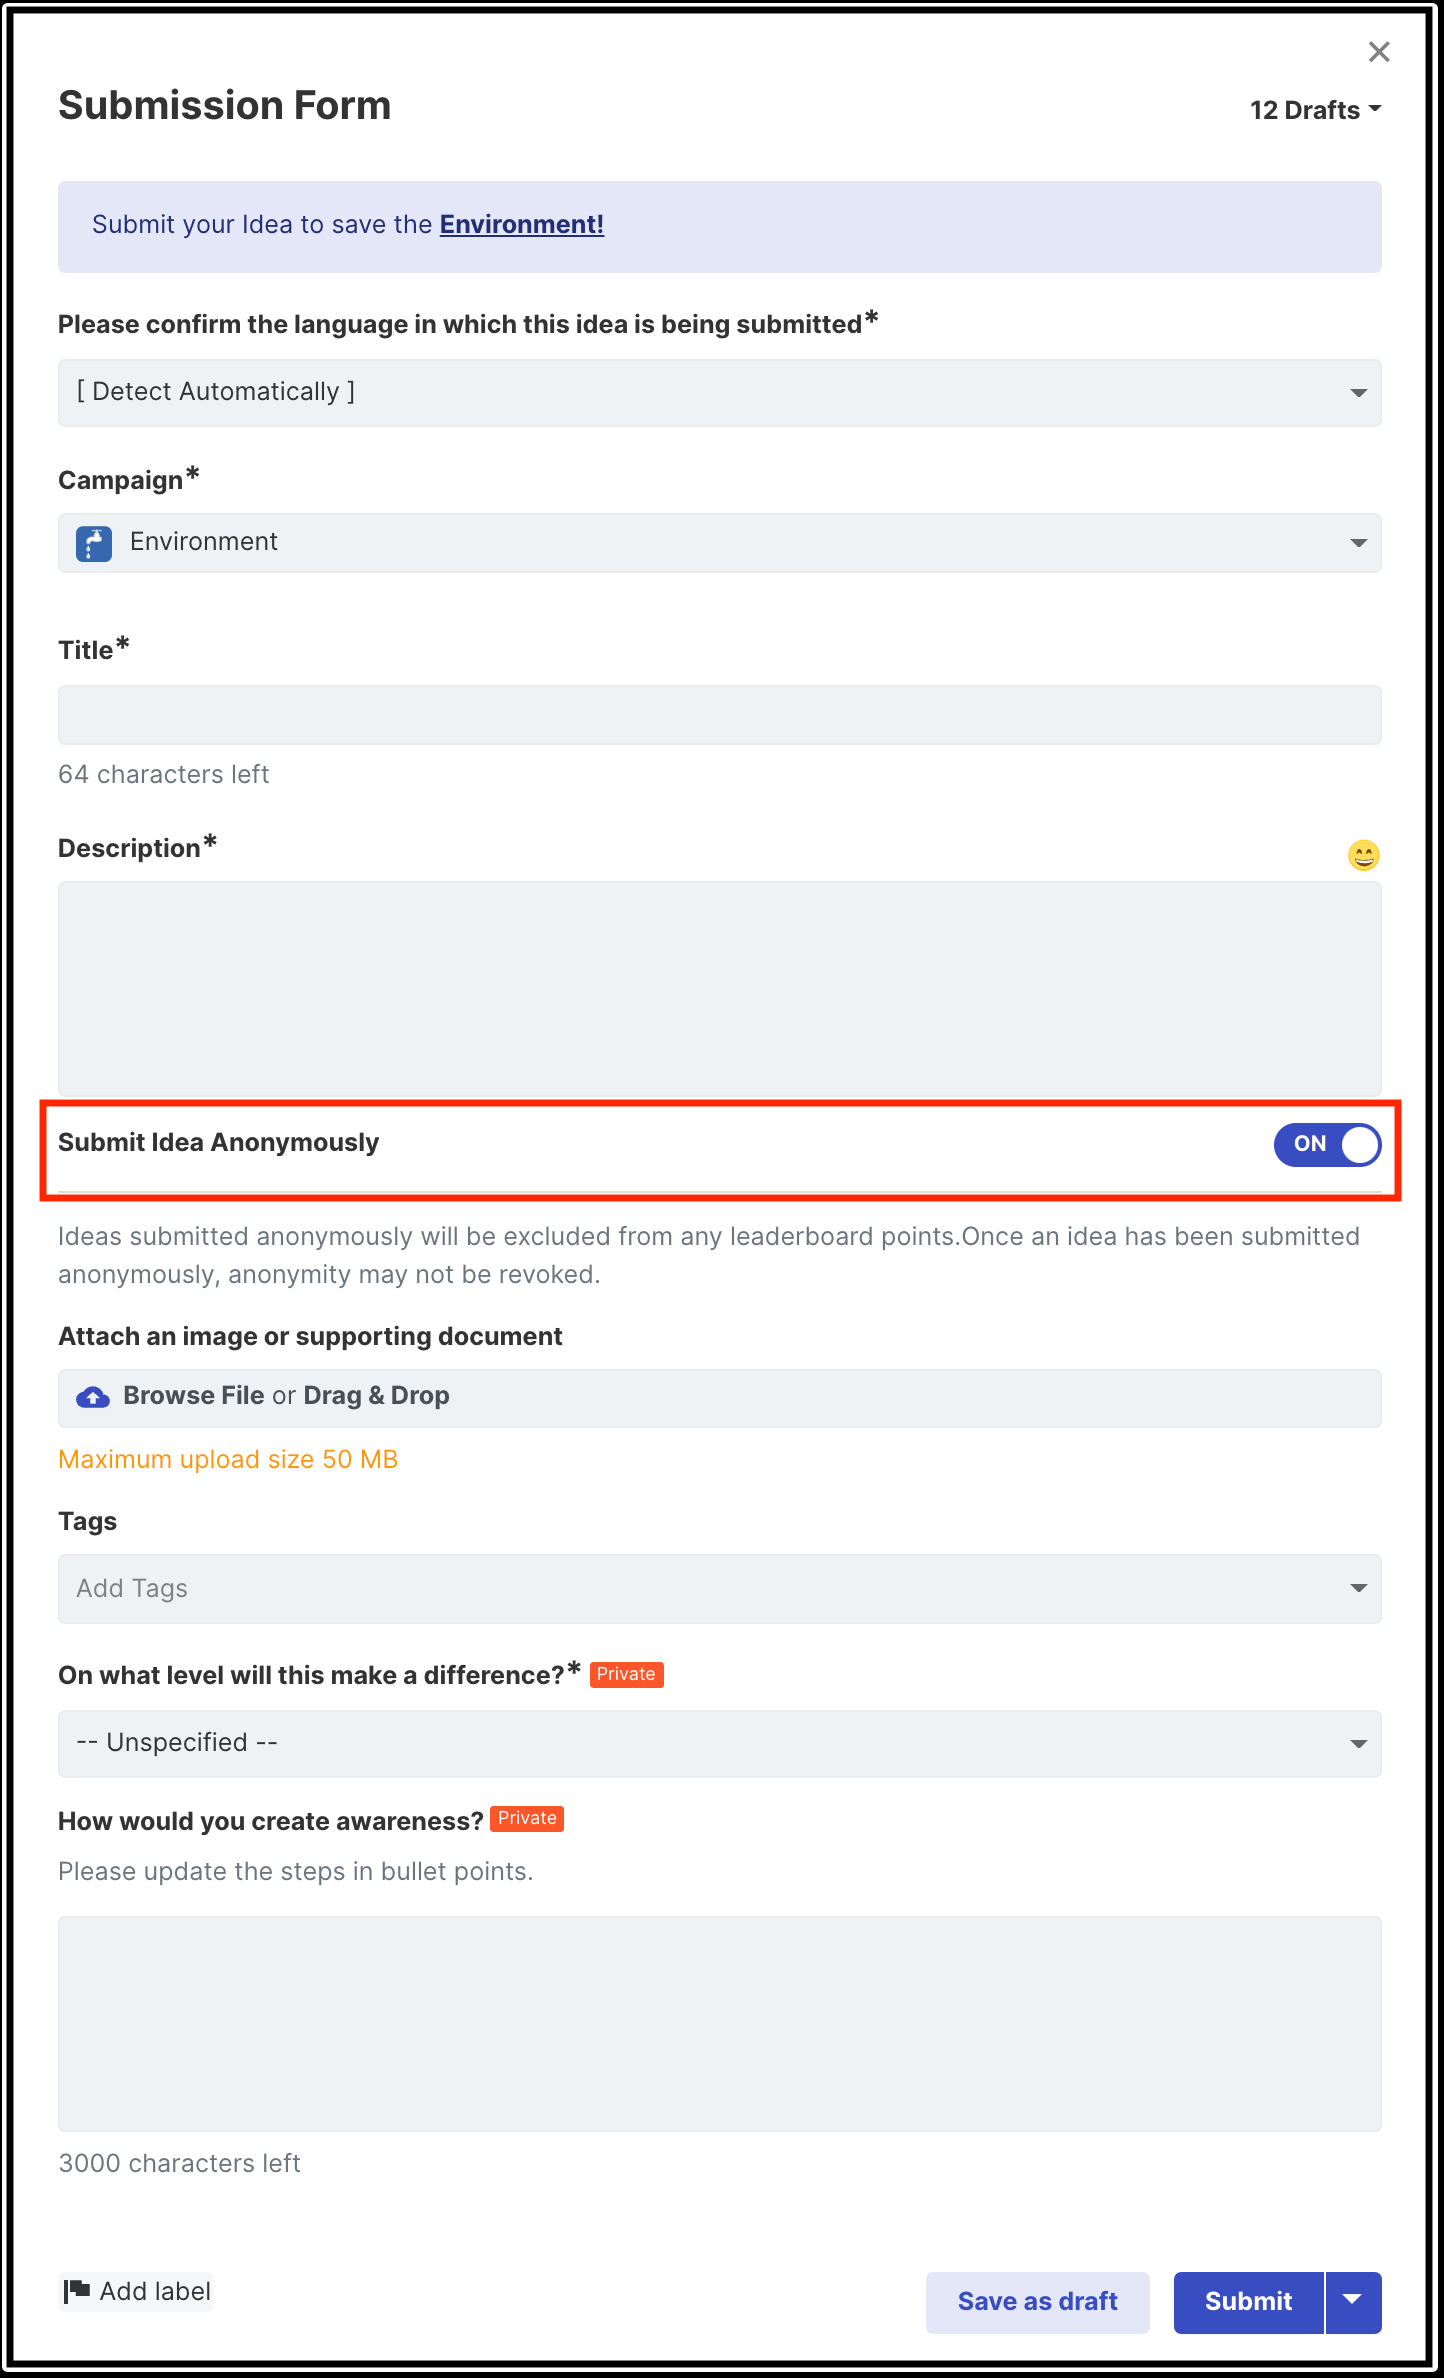
Note: Ideas submitted anonymously will be excluded from any leaderboard points. Once an idea has been submitted anonymously, anonymity can not be revoked.
3. Idea Anonymous by Default: Enabling the switch 'Allow Anonymous Idea Submission' opens up an option to enable all the ideas submitted to Anonymous by default in the campaign.
Note: Users can still turn OFF the 'Submit Idea Anonymously' option on the idea submission form and submit an idea.
4. Allow Anonymous Commenting: This feature enables the users to submit comments anonymously in the specific campaign while in the rest of the community, user names will still appear.
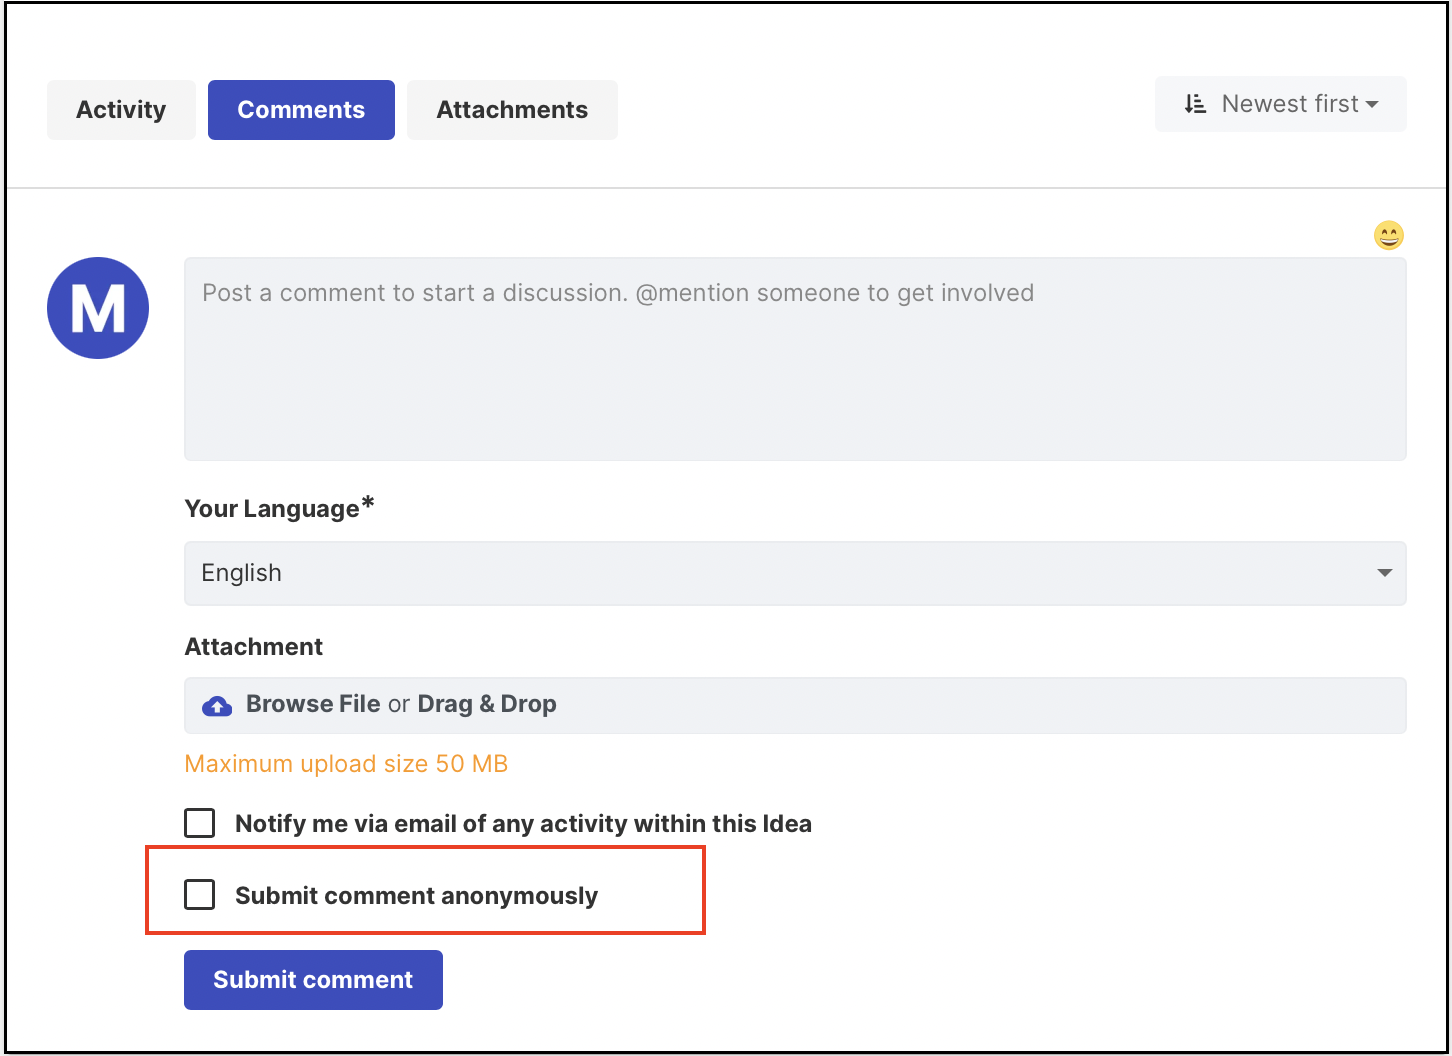
5. Comment Anonymous by Default: Enabling the switch 'Allow Anonymous Comment Submission' opens up an option to enable all the ideas submitted in the private campaign to remain anonymous by default.
Note: Users can still turn OFF the 'Submit comment anonymously' option under the comment section.

6. New Ideas Approval: Enabling this switch will require approval for all the ideas submitted to this campaign.
Note: This setting will appear in the campaign settings only if the New Idea approval setting is disabled at the community level.
7. Moderator Ideas require Approval: Enabling this setting will require approval for all the ideas submitted by a moderator.
8. IP-based Access Restriction: Access restriction based on IP address can be set for a specific campaign using this section. For community-level IP-based access, and restrictions Click Here.
9. Allow submissions to be 'private, only viewable to admins, moderators, and authorized groups: This feature actually allows the user to submit ideas privately. These ideas are being accounted for in the 'Campaign activity' section though it is not visible to normal/standard users. It can only be viewed by the submitter, co-submitters, moderators, admins, and authorized groups.
10. Force submissions to be 'private, only viewable to admins, moderators, and authorized groups: This feature actually forces private submissions, because it does not give the idea authors a choice to elect to submit privately or publicly. It just makes all submissions to the campaign private by default. Normal/standard users cannot view these ideas. It can only be viewed by the submitter, co-submitters, moderators, admins, and authorized groups.
11. Notify admins and moderators: When enabled, the admins and moderators of the community will receive an email notification when a private idea is submitted to the campaign.
12. Authorized groups to view private submissions: The administrator can select the groups in which he would like to view the private submission.
2. Campaign Brief
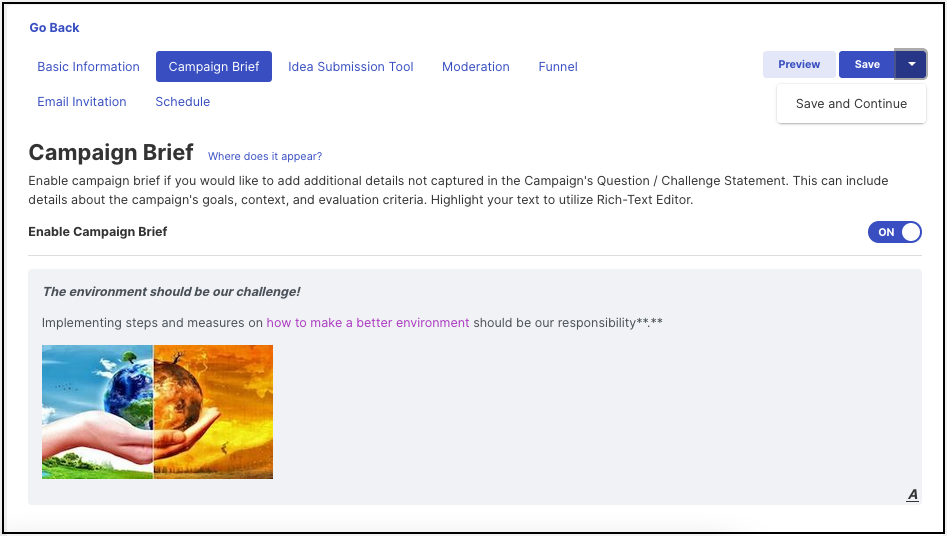
a. Campaign Brief
This section allows you to write a detailed description that could not be mentioned in the Question / Challenge statement. This can have information about the campaign's mission, goal, context, and evaluation criteria.
b. Terms of Service

This section allows you to create a set of rules for the campaign. Members will only be able to view and participate in the campaign after agreeing to the Terms of Service.
Note: Apart from Campaign brief tab, the campaign brief and TOS can be changed from frontend using Edit mode.
3. Idea Submission Tool
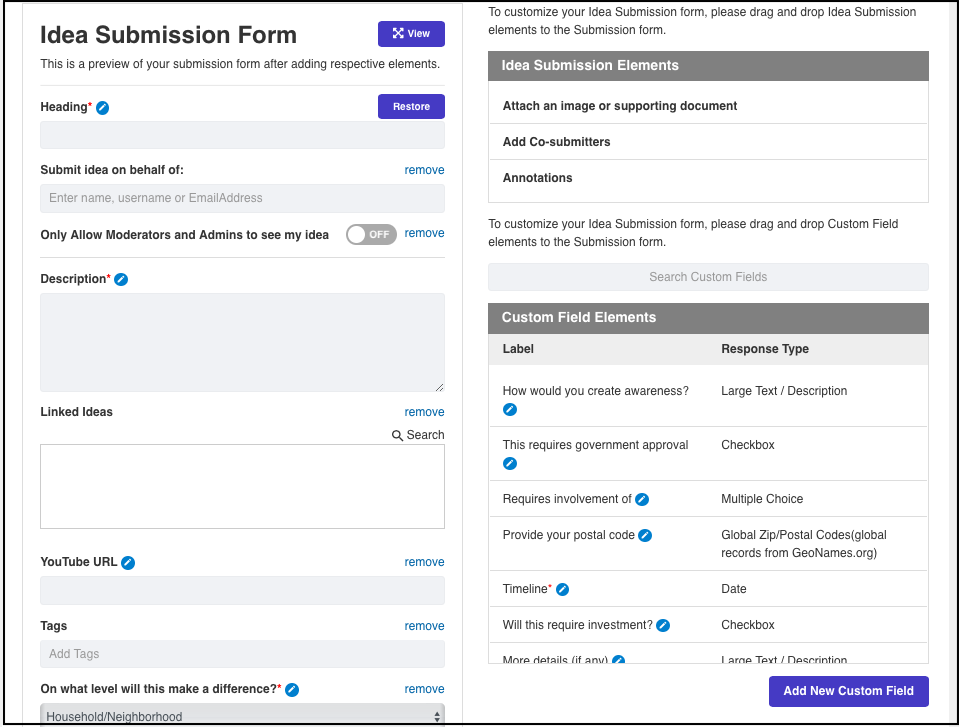
The idea submission tool consists of three sections one being the Idea Submission Form preview, Idea Submission Elements, and Custom Field Elements and a Section for Custom Fields. This is a list of all the elements that go into the form while submitting an idea. We have developed this tool in a very easy drag-and-drop manner for your convenience and fast amendments in the campaign in terms of these elements. This gives the feasibility to arrange all the questions on the form as per your requirement by simply dragging and rearranging it to the order you would want it to appear.
Learn more about the Idea Submission Tool
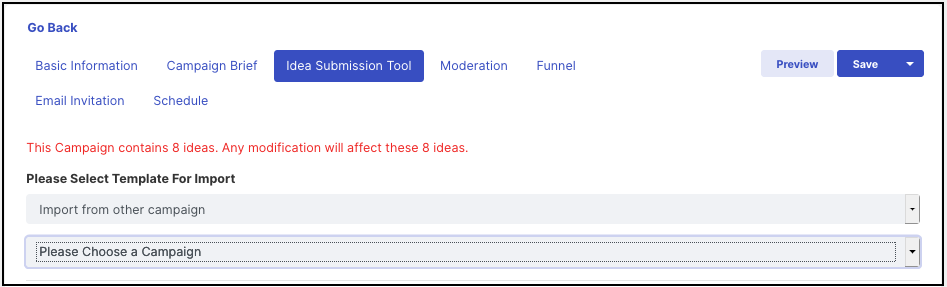
a. Template for Import
Administrators can create a fresh template or import the exact template i.e. all the settings and custom fields needed in the campaign's idea submission form from another campaign within the community.
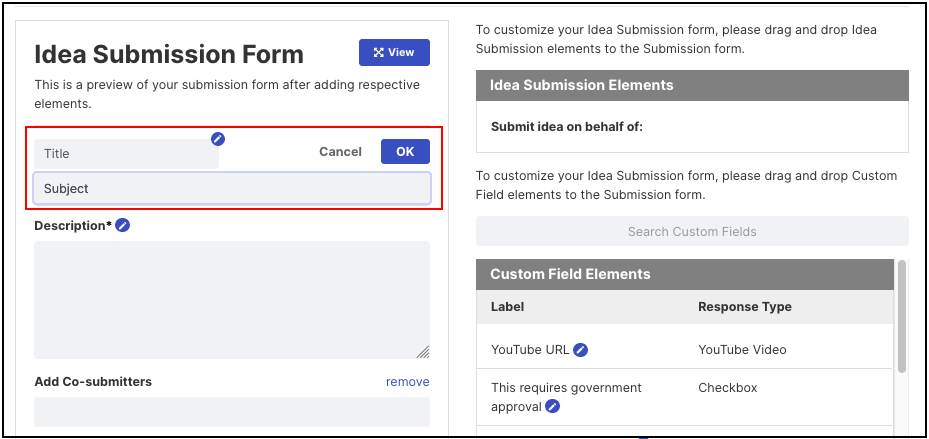
b. Idea Submission Form
This is a preview of the form after setting up all the elements for the particular campaign. All the elements which have been set as Required in the Idea Submission settings will appear in the preview and will not have the Remove link.
You can edit the text Title and Description for each campaign separately from here. Simply click on the Pen icon to get a field to enter text. Click on the OK button once done.
c. Idea Submission Elements
These are the elements that the admin can add to the submission form by simply drag and drop in the submission form preview section. So the elements you could add are Submit Idea on Behalf of, Add Co-submitters, Tags, Attach an image or supporting document, and Add Links.
d. Custom Field Elements
These display the idea custom field that we have created in Idea Custom Field setting depending upon the requirement. If we have created any custom field as required it will always appear in the Idea Submission form preview and cannot be removed. However, if we have any custom field which is not required you will see it in this element. In the above screenshot, you can see the Idea Custom Field with a link named Remove. Admin can also edit the custom fields by clicking on the Pen icon beside the custom field title.
Click here to learn how to add, edit or delete a custom field
4. Moderation
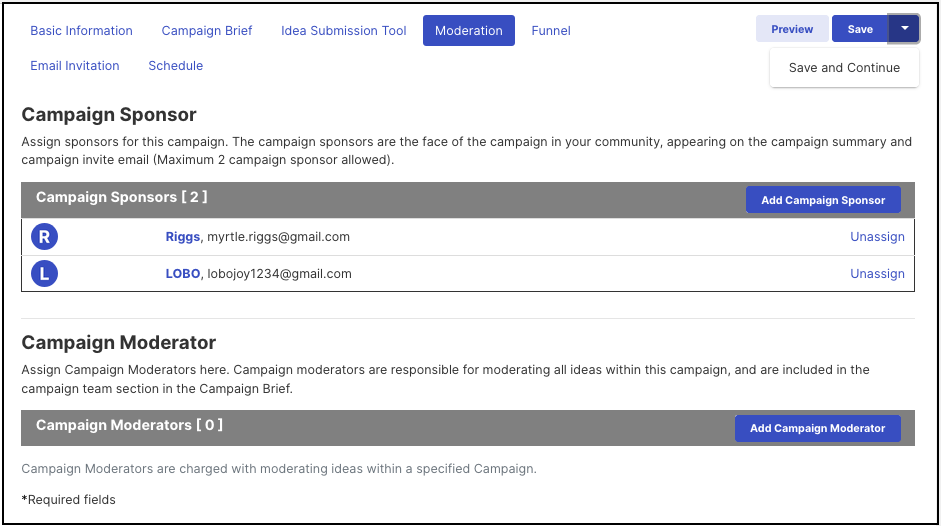
a. Campaign Sponsor:
The assigned campaign sponsor will be the face of the campaign bearing his/her name on all the campaign invites and campaign summaries. However, they would not able to edit or manage the campaign unless they are also an administrator in the community.
Note: Maximum 2 campaign sponsors can be assigned to a campaign.
b. Campaign Moderator:
As the word clearly states moderation of the campaign can be assigned to 'Campaign Moderators' who would be responsible for moderating all ideas within this campaign.
5. Funnel
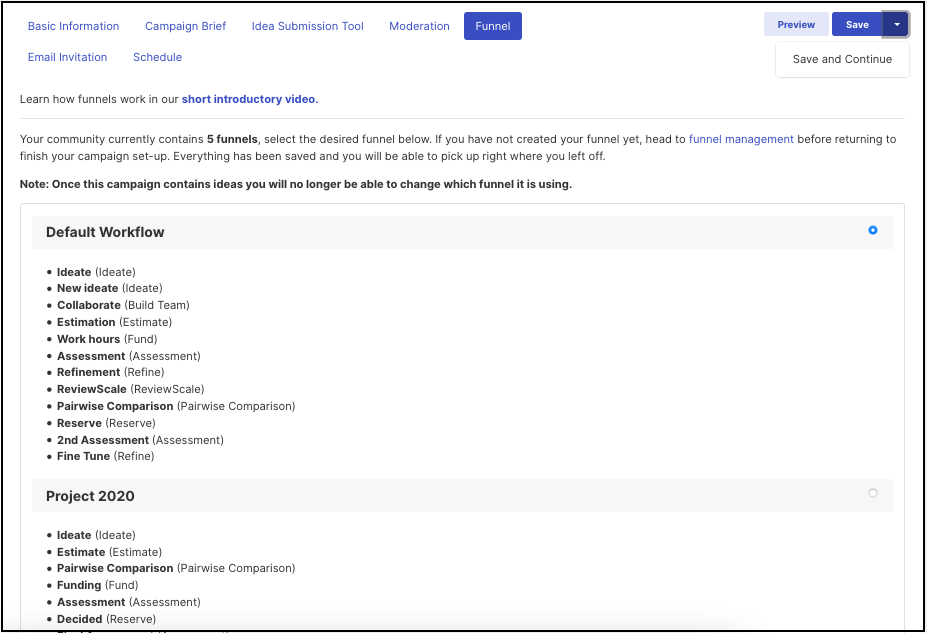
Funnels are nothing but stages from which each idea goes through during the process of getting the best idea to the last stage. Funnels need to be set up in Workflow >> Funnel Management. The community comes along with a default funnel in which you have a few stages. While setting up the campaign you could opt for the funnel of your choice. Once an idea is submitted to the campaign the funnel cannot be changed or altered.
To learn more about funnels Click Here.
6. Email Invitation


Email Invitation is sending a personalized invitation for the specific campaign inviting users to participate. This email contains the campaign banner, logo, subject, and body of the email giving details of the campaign.
a. Enable Email Test: This allows you to send a test email to anyone recipient to see how the Campaign Invite Email looks like.
b. Email Preview: This gives us a clear picture of how our email invitation will actually look when it is sent to the users.
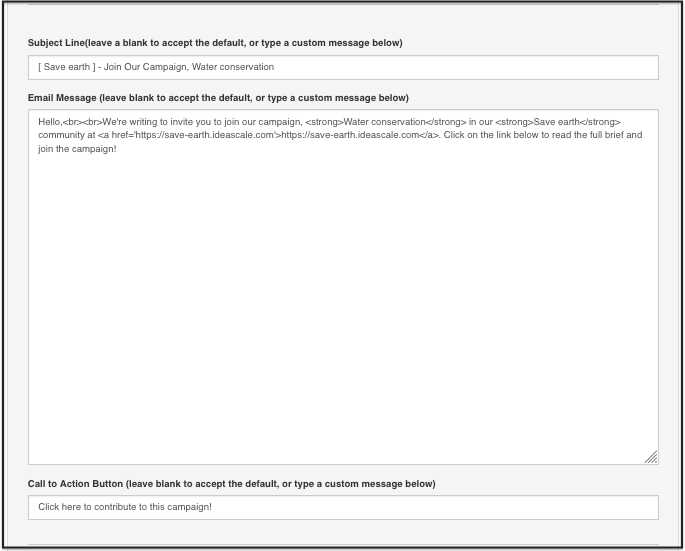
c. Subject Line: This section allows you to customize the subject of the email.
d. Email Message: This space can be utilized to pen down a message or an invitation inviting your list of users to participate in the campaign.
e. Call to Action Button: Customize this button to something catchy so the users are ready to get started with their ideas in the campaign.
f. Send Date: We can schedule the send date and the invitation will be sent at 00.00 PST on the date selected. In case it is today's date and is past 00.00 PST the email will be sent immediately.
g. Send to: We can opt for the email to be sent to all community members, specific groups in the community, or if the campaign is private then only to the members of the specific campaign.
h. Custom Email Banner: The email invitation can be customized along with the email banner related to the campaign.
Please Note
- The Campaign Invitations will be only sent out to members whose email status is verified
- Campaign invites can be sent only once for each campaign on a particular day
- The campaign invites will use the default From Email address or the one specified in the General Settings >> Emails and Notifications >> General Email Settings.
7. Schedule
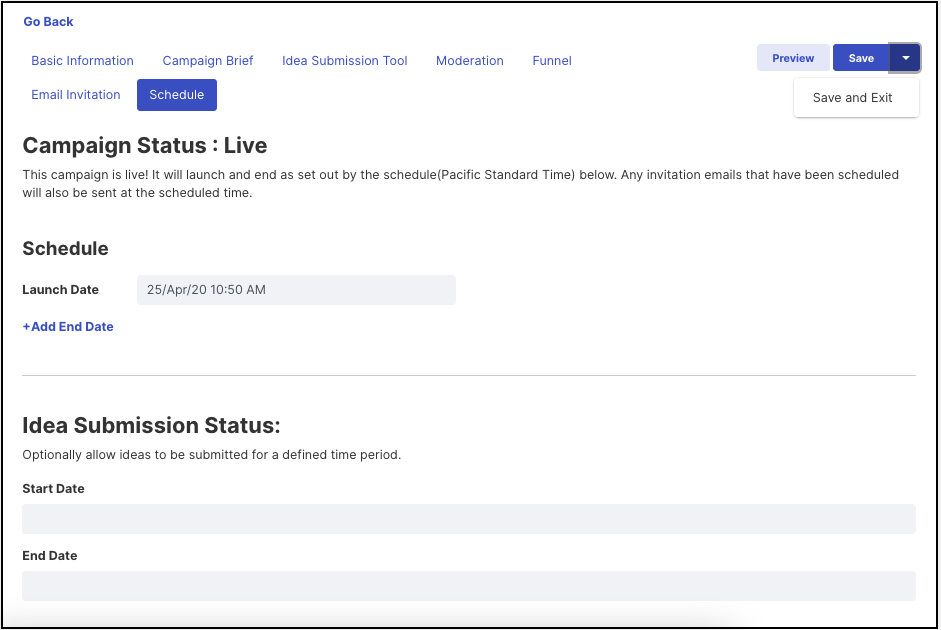
a. Launch Date: The administrator of the community can pre-set a date as well as time for the launch of the campaign along with an end date when they intend to close the campaign. You could also launch the campaign immediately if the community administrator is ready to release the campaign to the users by clicking on the 'Launch Immediately' link.
b. End date: After a Campaign concludes (post end date), they get archived and are moved to 'Archived Campaigns' by the system where they are available for viewing to community users but are closed for any activity like voting, commenting, etc. 'Archive Immediately' option is available to archive the campaign right away.
Note: The end date cannot be a back date (past date). It will need to be a current or future date.
Idea Submission Status: This allows the administrator of the community to set a start and end date for idea submissions in the specific campaign. After the end date, any new idea submission will not be submitted.
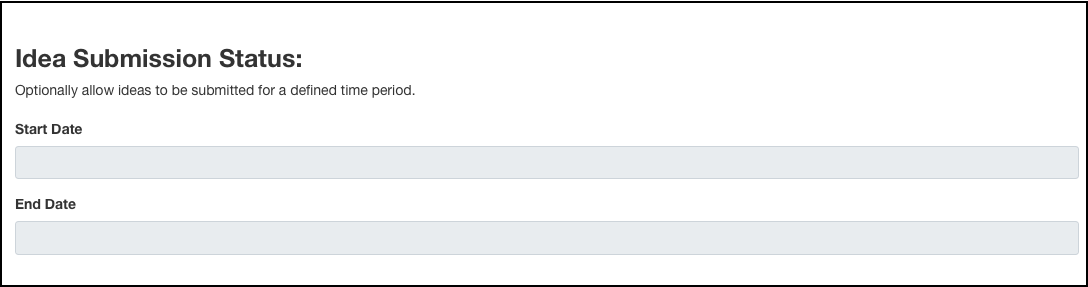
Note: Idea submission timer on front-end Campaign page top banner will start displaying the timer only 30 days before idea submission end date.
Enabling or Disabling a Campaign: Campaign settings do not have an enable button, however, we could always use the 'Save as Draft' switch while creating a campaign in the Launch section to stop it from reflecting on the homepage to the normal users.
In case the campaign has not launched and the admin does not want the campaign to be visible to users simply set a future date as the Launch date which will automatically remove the campaign from the homepage.
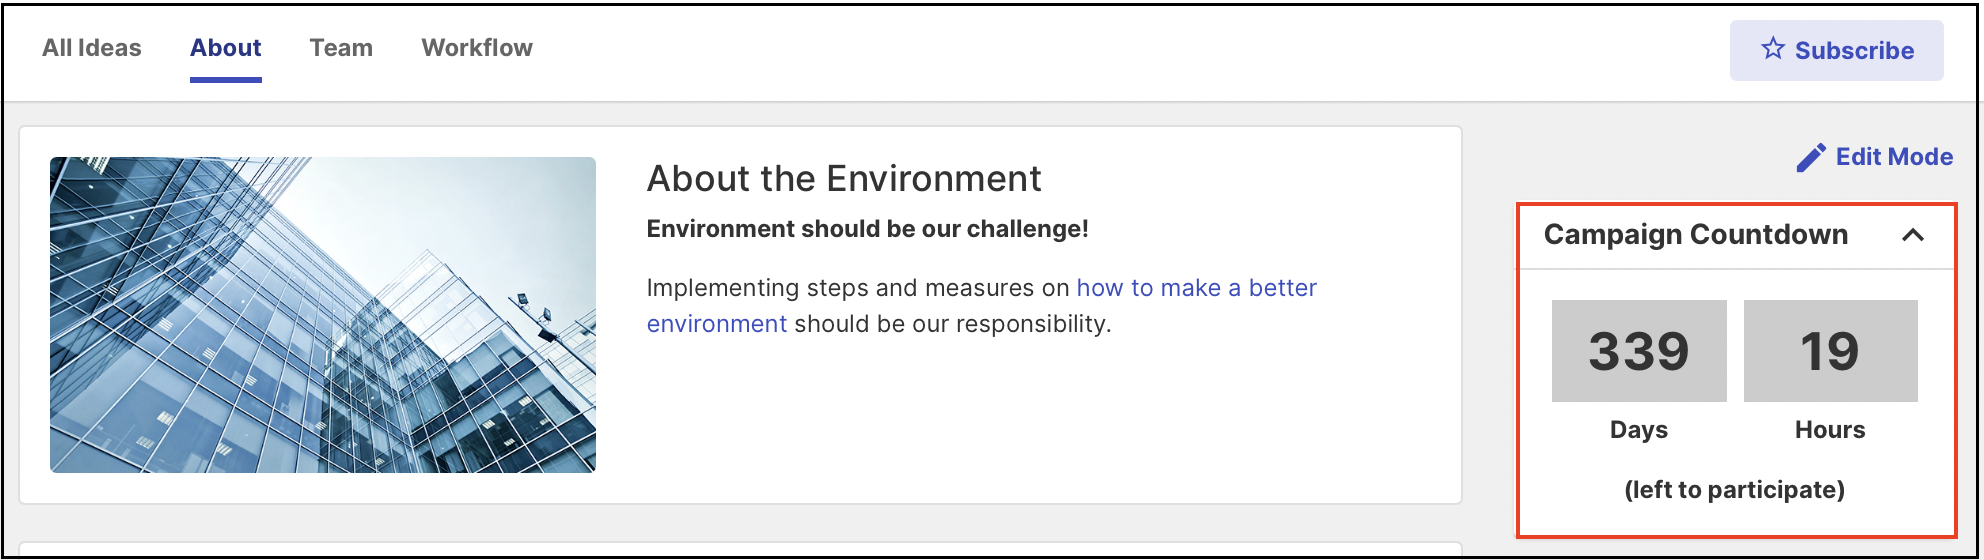
c. Show Countdown Timer: When the admin sets an end date for a campaign, users see another option to 'Show countdown timer. The timer shows up on the campaign page to remind users about the time left for participating in the campaign.
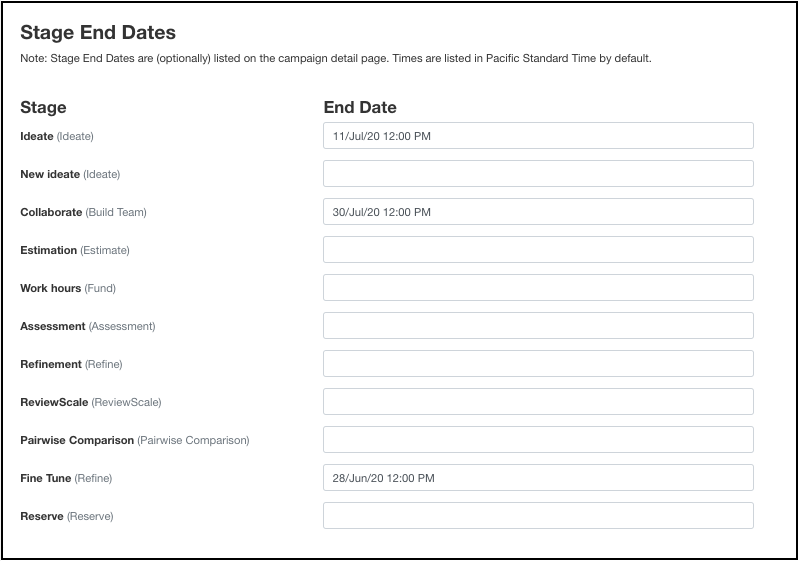
d. Stage End Dates: The latest feature in the Campaign is an end date for each stage in the campaign. This will stop the members from participating in voting and comments in that particular stage after the end date specified.
This will reflect as a Timeline in the campaign details section.
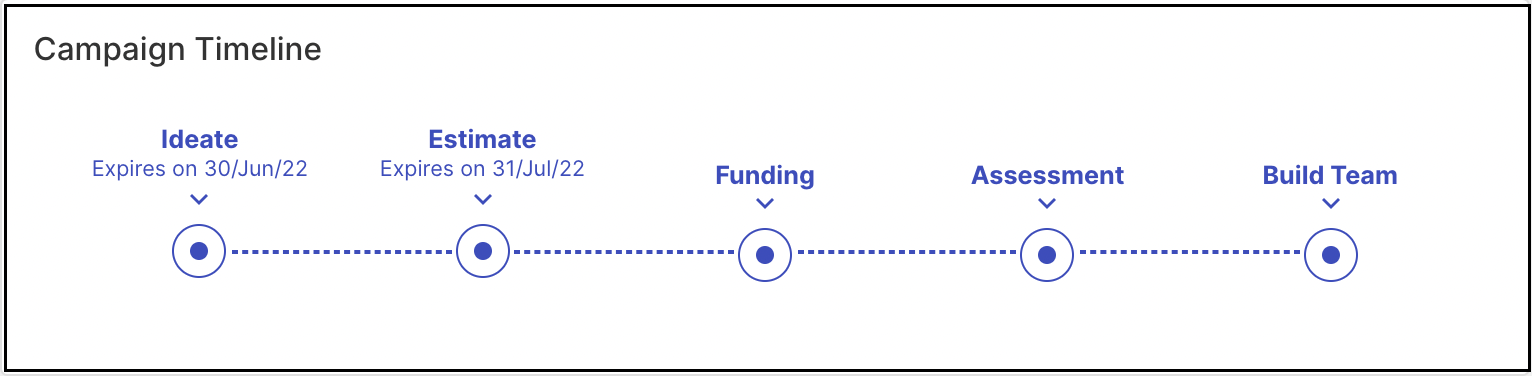
Note: Expired, as well as archived stage's chevron, will appear grey.
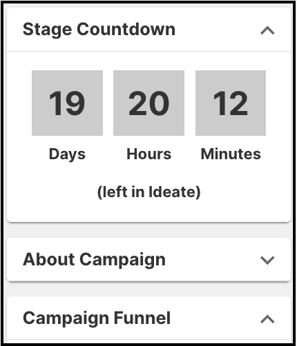
The stage end date will be shown in the form of a countdown timer on the campaign sidebar when a member navigates to the stage's idea list.
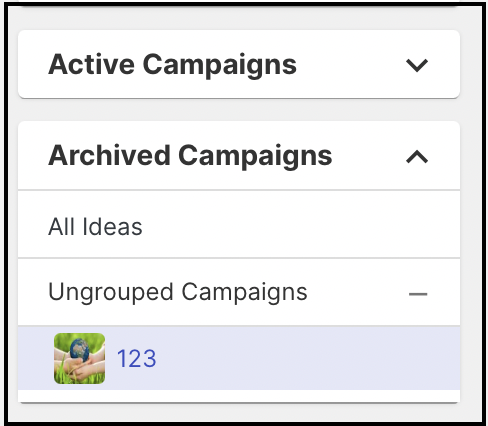
Archived Campaigns
Once a campaign has ended i.e. it is past the end date, it will become an 'Archived Campaign'. This campaign will not be visible under the 'Active Campaigns' list on the homepage. Instead, a new section called 'Archived Campaigns' will show up on the homepage which houses all the expired campaigns.
Administrators, Global moderators, and campaign moderators (specific archived campaign moderators) can edit, add comments, and add an attachment to an idea. However campaign moderator (other active campaigns) and a standard user would be able to only view the ideas and comments, and no activity would be allowed.