Path: Path: Workspace Homepage >> Navigation Panel >> >> Campaign >> Community >> Workflow >> Ideate Stage
The Ideate stage enables community members to express their preferences by voting ideas up or down, with each member limited to a single vote per idea. Administrators can configure the voting experience by disabling downvotes to allow only upvotes, and choose to permit or restrict vote retraction based on program needs.
TABLE OF CONTENTS
Ideate Stage Setup
1. Info
2. Settings
3. Automation
4. Permissions
Ideate Stage Setup
Ideate Stage setup is divided into 4 tabs - Info, Settings, Automation & Permissions. Let's see them in detail.
1. Info

Info section contains basic details about the stage as follows:
Stage Function - Select Ideate stage from drop down. Once selected and saved, this section will be greyed out and cannot be changed to other stage
Stage Name - Create a custom name/label for the stage. Note: Character limit is 40.
Stage Key - It is a unique identified for the specific stage required for API call data retrieval. Once saved, the key cannot be changed.
Description - Describe stage functionality or how you would like to use this stage. This description will be mouseover text on the stages stack on the right navigation of the community homepage
Stage Color - Select a color for the stage from the 10 available default options.
Reported Ideas As - Set the stage as Selected, Implemented or blank to apply the respective label to all ideas within that stage. Help article on Selected & Implemented Ideas
Enable Stage - Select this checkbox to activate the stage, enabling ideas to be moved into it.
Stage Change Notification - Select this checkbox to activate the stage change notification. Enabling it will send a stage change email notification to the members who have opted for it.
2. Settings
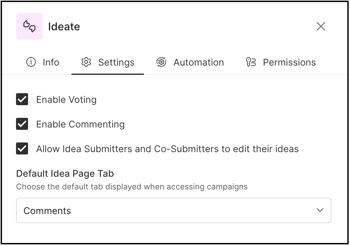
Settings section contains stage specific settings as follows:
Enable Voting: Community admin can control voting for this stage using the ON/OFF toggle switch.
When voting is enabled, the vote counting method can be configured for second Ideate stage. Votes may be tallied either cumulatively across stages or separately for each stage. Help article on Cumulative vote vs per stage basis vote
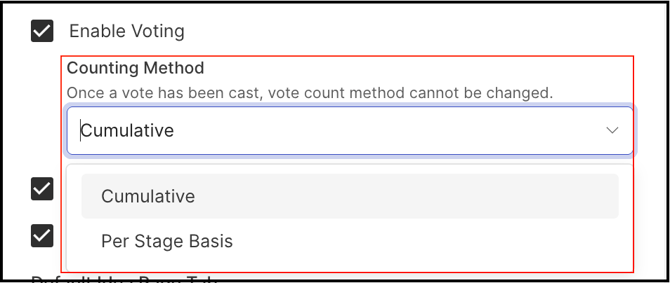
Note: The Counting Method option is available only when a second Ideate stage is configured in the workflow. If there is only one Ideate stage, this option does not appear.
Enable Commenting: Commenting can be enabled/disabled in this stage by using ON/OFF toggle switch.
Allow Idea Submitters and Co-Submitters to edit their ideas: The idea submitters and the co-submitters will be able to edit the ideas in this stage if this switch is enabled.
Default Idea Page Tab: The community administrator can configure a default tab for the idea details page by selecting one of three available options: Comments, Activity, or Attachments.
3. Automation

Use this section to configure automation for the Ideate stage. When automation is enabled, the Community admin can define a target threshold for Net Votes. Once an idea meets or exceeds this threshold, it will automatically advance to the next stage in the workflow.
4. Permissions
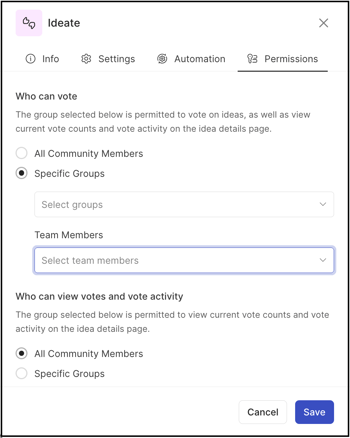
The Permissions section in the Ideate stage defines who can vote on ideas in that stage and who can view vote counts and voting activity on the idea detail page. A community administrator can configure these permissions for all community members, for a specific group, or for a specific Team Member role (Only if a team role has been specified & filled in any build team stage in the same funnel).
Stage Functionality on Homepage
-
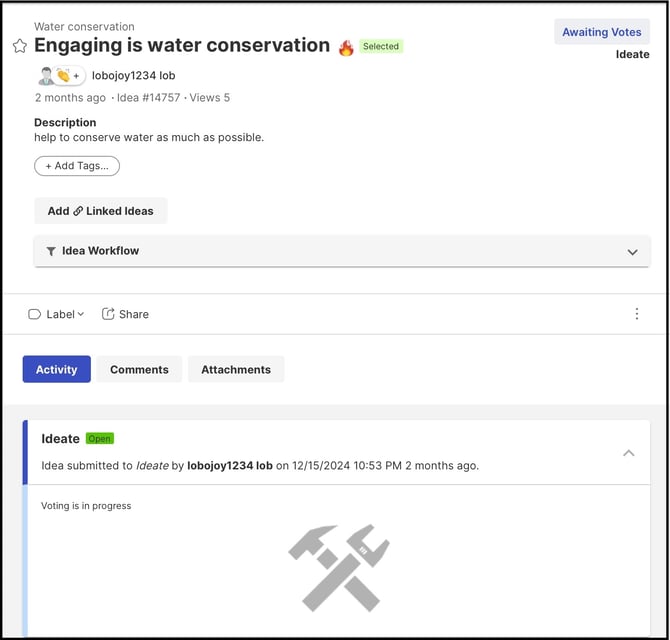
Once an idea is moved to ideate stage, participants who are permitted to vote can vote on ideas.
-
The vote count displayed within the vote box is net votes i.e difference between up vote and down vote.

- Participants who are permitted to only view will be able to see the vote count and vote activity. The voting arrows will be greyed out.

-
Participants who are not permitted to view or participate will not see the progress bar, net votes, or the voting details.