How to integrate IdeaScale with Azure Active Directory
Path: Manage Workspace >> Security >> Authentication >> Single Signon Settings
This article will help us to integrate IdeaScale with Azure Active Directory (Azure AD).
Integrating IdeaScale with Azure AD provides you with the following benefits:
-
You can control in Azure AD who has access to IdeaScale
-
You can enable your users to automatically get signed-on to IdeaScale (Single Sign-On) with their Azure AD accounts
-
You can manage your accounts in one central location - the Azure portal
If you want to know more details about SaaS app integration with Azure AD, see what is application access and single sign-on with Azure Active Directory
Prerequisites
To configure Azure AD integration with IdeaScale, you need the following items:
-
An Azure AD subscription
-
An IdeaScale single-sign on enabled subscription
To test the steps in this tutorial, we do not recommend using a production environment.
Scenario description:
In this tutorial, you test Azure AD single sign-on in a test environment. The scenario outlined in this tutorial consists of two main building blocks
Adding IdeaScale from the gallery
To configure the integration of IdeaScale into Azure AD, you need to add IdeaScale from the gallery to your list of managed SaaS apps.
To add IdeaScale from the gallery, perform the following steps
-
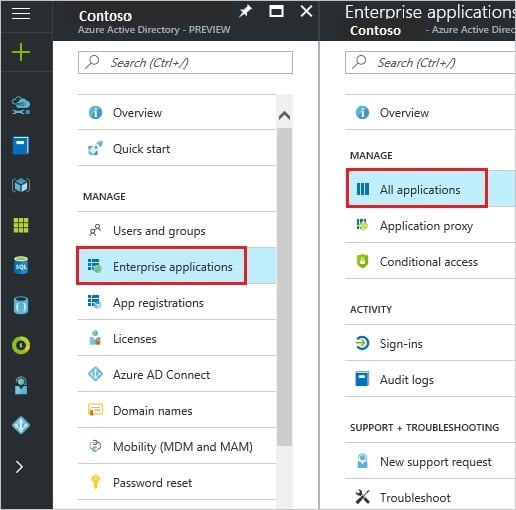
In the Azure portal, on the left navigation panel, click Azure Active Directory icon.
![]()
2. Navigate to Enterprise applications. Then go to All applications.
3. To add new application, click New application button on the top of dialog.
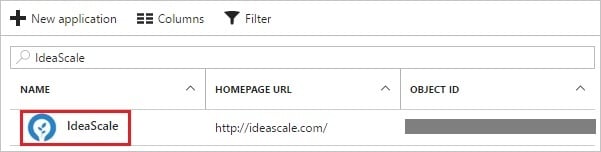
4. In the search box, type IdeaScale.

5. In the results panel, select IdeaScale, and then click Add button to add the application.

Configuring and testing Azure AD single sign-on
In this section, you configure and test Azure AD single sign-on with IdeaScale based on a test user called "Myrtle Riggs."
For single sign-on to work, Azure AD needs to know what the counterpart user in IdeaScale is to a user in Azure AD. In other words, a link relationship between an Azure AD user and the related user in IdeaScale needs to be established.
In IdeaScale, assign the value of the user name in Azure AD as the value of the Username to establish the link relationship.
To configure and test Azure AD single sign-on with IdeaScale, you need to complete the following building blocks
-
Configuring Azure AD Single Sign-On - to enable your users to use this feature.
-
Creating an Azure AD test user - to test Azure AD single sign-on with Myrtle Riggs.
-
Creating an IdeaScale test user - to have a counterpart of Myrtle Riggs in IdeaScale that is linked to the Azure AD representation of user.
-
Assigning the Azure AD test user - to enable Myrtle Riggs to use Azure AD single sign-on.
-
Testing Single Sign-On - to verify whether the configuration works.
Configuring Azure AD single sign-on
In this section, you enable Azure AD single sign-on in the Azure portal and configure single sign-on in your IdeaScale application.
To configure Azure AD single sign-on with IdeaScale, perform the following steps
-
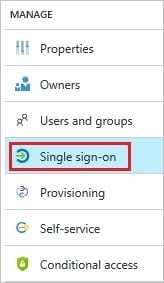
In the Azure portal, on the IdeaScale application integration page, click Single sign-on
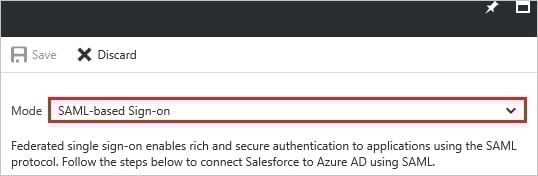
2. On the Single sign-on dialog, select Mode as SAML-based Sign-on to enable single sign-on.
3. On the IdeaScale Domain and URLs section, perform the following steps:
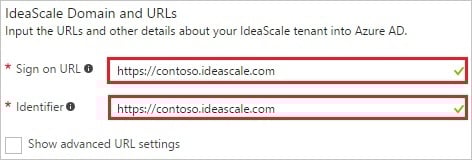
a. In the Sign-on URL textbox, type a URL using the following pattern: https://<companyname>.ideascale.com
b. In the Identifier textbox, type a URL using the following pattern:
https://<companyname>.ideascale.com
4. On the SAML Signing Certificate section, click Metadata XML and then save the metadata file on your computer.

5. Click Save button.
6. On the IdeaScale Configuration section, click Configure IdeaScale to open Configure sign-on window. Copy the Sign-Out URL, and SAML Entity ID from the Quick Reference section.

7. In a different web browser window, log in to your IdeaScale company site as an administrator.
8. Go to Manage Workspace >> Security >> Authentication >> Single Signon Settings.

9. As Single-Signon Type, select SAML 2.0.
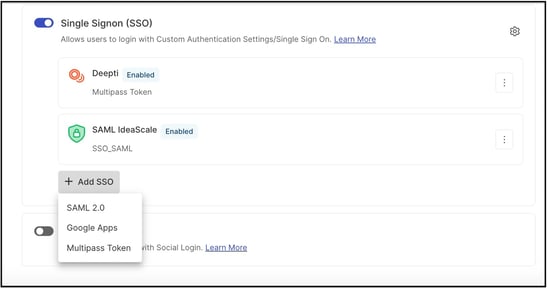
10. On the Single Signon Settings dialog, perform the following steps:

a. In SAML IdP Entity ID textbox, paste the value of SAML Entity ID which you have copied from Azure portal.
b. Copy the content of your downloaded metadata file from Azure portal, and paste it into the SAML IdP Metadata textbox.
c. In Logout Success URL textbox, paste the value of Sign-Out URL which you have copied from Azure portal.
d. Click Save Changes.
Tip:
You can now read a concise version of these instructions inside the Azure portal, while you are setting up the app! After adding this app from the Active Directory > Enterprise Applications section, simply click the Single Sign-On tab and access the embedded documentation through the Configuration section at the bottom. You can read more about the embedded documentation feature here: Azure AD embedded documentation
Creating an Azure AD test user
The objective of this section is to create a test user in the Azure portal called Myrtle Riggs.

To create a test user in Azure AD, perform the following steps
-
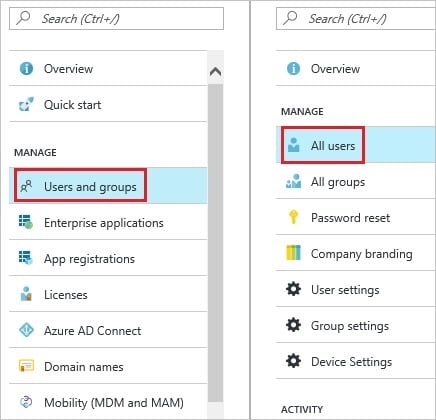
In the Azure portal, on the left navigation pane, click Azure Active Directory icon.
2. To display the list of users, go to Users and groups and click All users.
3. To open the User dialog, click Add on the top of the dialog.
4. On the User dialog page, perform the following steps:
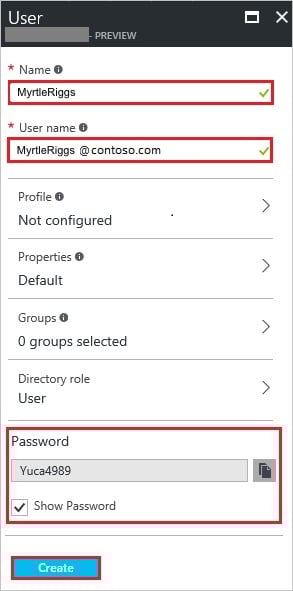
a. In the Name textbox, type MyrtleRiggs.
b. In the User name textbox, type the email address of MyrtleRiggs.
c. Select Show Password and write down the value of the Password.
d. Click Create
Creating an IdeaScale test user
To enable Azure AD users to log into IdeaScale, they must be provisioned in to IdeaScale. In the case of IdeaScale, provisioning is a manual task.
To configure user provisioning, perform the following steps:
1. Log in to your IdeaScale site as workspace administrator.
2. Go to Manage Workspace.
3. Go to Manage Workspace >> Member Management.
4. Click Quick Add.
5. In the Add New Member section, perform the following steps:

a. In the Email Addresses textbox, type the email address of a valid AAD account you want to provision.
b. Click Save Changes.
The Azure Active Directory account holder gets an email with a link to confirm the account before it becomes active. You can use any other IdeaScale user account creation tools or APIs provided by IdeaScale to provision AAD user accounts.
Assigning the Azure AD test user
In this section, you enable Myrtle Riggs to use Azure single sign-on by granting access to IdeaScale.
To assign Myrtle Riggs to IdeaScale, perform the following steps:
-
In the Azure portal, open the applications view, and then navigate to the directory view and go to Enterprise applications then click All applications.
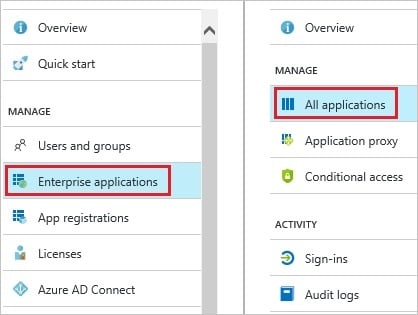
2. In the applications list, select IdeaScale.
3. In the menu on the left, click Users and groups.

4. Click Add button. Then select Users and groups on Add Assignment dialog.
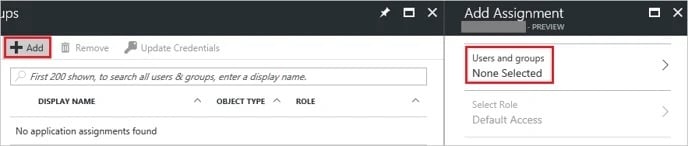
5. On Users and groups dialog, select Myrtle Riggs in the Users list.
6. Click Select button on Users and groups dialog.
7. Click Assign button on Add Assignment dialog.
Testing single sign-on
1. The objective of this section is to test your Azure AD single sign-on configuration using the Access Panel.
2. When you click the IdeaScale tile in the Access Panel, you should get automatically signed-on to your IdeaScale application.