Path: Workspace Homepage >> Navigation Panel >> AI Features >> Enable MCP Server
Introducing the IdeaScale MCP Server!
Our very own MCP (Model Context Protocol) feature is here to make securely accessing community data easier than ever using LLM. With simple question prompts to the chatbot, you can instantly retrieve information on ideas, campaigns, funnels, stages, labels, and members—streamlining insights and saving valuable time.
This feature ensures secure Admins and Moderators access through the use of API keys and service tokens. The data that can be retrieved is in line with the existing roles and permissions assigned within IdeaScale.
To allow Admins & Moderators to utilize the IdeaScale MCP server, the workspace admin must enable the appropriate setting by navigating to Workspace Homepage >> Navigation Panel >> Settings >> AI Features > > Enable MCP Server and switching it on. 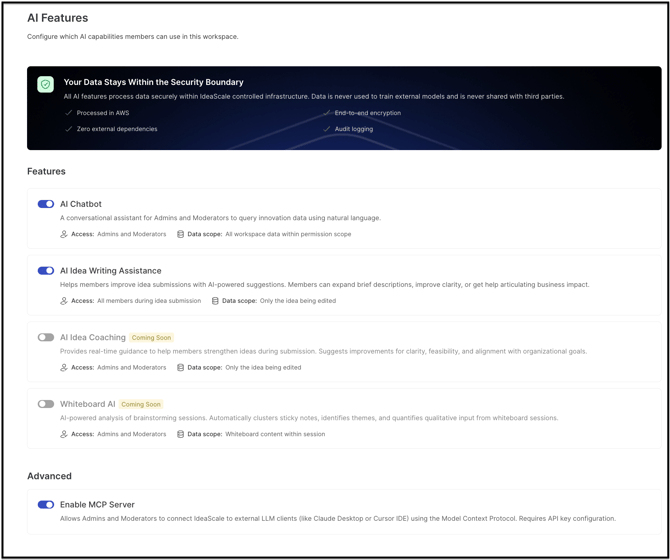
The IdeaScale MCP server is designed to work with a range of LLM clients, including Claude and Cursor IDE. Please check its compatibility with your specific LLM client today!
Note: IdeaScale MCP Server is available only to the Community admins and any type of moderators. Normal members do not have access to it.
TABLE OF CONTENTS
IdeaScale MCP Server with Claude
Integration with Claude and Claude Desktop using Custom Connector
IdeaScale MCP Server with Cursor IDE
OpenWebUI setup
IdeaScale MCP server with Claude
Follow the given steps to setup IdeaScale MCP server with Claude:
1. To begin, download and install the following
- Claude desktop application from https://claude.ai/download
- Node.js from https://nodejs.org/en/download.
2. Once installed, sign up or log in to the Claude application and navigate to Settings >> Developer.

3. Select the Edit Config button to locate and open the configuration file for editing.

4. Please input the following code, that can be found under your IdeaScale Profile >> Settings >> MCP Servers >> Configuration for Claude Desktop. Ensure that you replace the [WORKSPACE_URL] with your specific Workspace URL followed by /mcp (Example: https://ideas.ideascale.com/mcp). Additionally, substitute the [COMMUNITY_API_TOKEN] with the appropriate API token for your community, accessible from IdeaScale Profile >> Settings >> API Tokens (Example: 91d465cf-08b0-4c74-be3f-1539e512925t). For further assistance, please refer to the help article on API tokens.
{
  "mcpServers": {
    "ideascale-mcp": {
      "command": "npx",
      "args": [
        "mcp-remote",
        "https://[WORKSPACE_URL]/mcp",
        "--header",
        "api_token:[COMMUNITY_API_TOKEN]"
      ]
    }
  }
}
5. Upon completing the modifications, please save the file, then exit the Claude application and reopen it to initiate the MCP server. You may remove the configuration by selecting the Recycle Bin/Trashcan icon.

6. You are now ready to begin utilizing the MCP server for your community data access needs.
Once you have completed the setup, navigate to the chat section to start interacting with the MCP server.
At the moment, the server supports GET API calls to retrieve the following data: Highest voted ideas, Trending ideas, Most viewed ideas, Most recent ideas, Ideas by Campaign, Ideas by Stage, Ideas by Author, Ideas by Label, Ideas by Tags, Ideas by Date range, Draft Ideas, Followed ideas, Top ideas, Active campaigns, Archived campaigns, Funnels, Stages, Members, All comments, Specific idea comments, Pending comments, Labels, My profile, My communities and Tags.
You can enable or disable these data options through the Tuning icon located under the text field.
If a required data option is disabled and a search query depends on that data point, the system will display an alert message prompting you to either enable the data point always, once or decline access.
For example, if the get_draft_ideas option is disabled and you attempt to search for "All my draft ideas", the system will display the following notification.

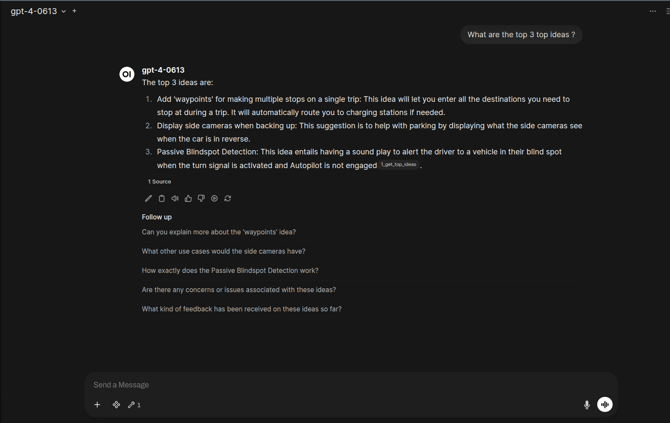
A visual representation of the data can also be generated.
In the following example, the system was prompted to produce a chart displaying the number of kudos received by members. The data was provided in both textual format and a variety of visual formats - Bar chart, Pie chart, Summary statistics, Detailed table and Key insights for enhanced clarity and analysis.

Integration with Claude and Claude Desktop using Custom Connector
You can use a custom connector to integrate the IdeaScale MCP server with Claude via the website or their desktop app.
Note: It is available only on Claude's Pro, Max, Team or Enterprise plans
Follow the given steps to set up the Custom connector:
1. Under Ideascale Profile >> Settings >> MCP server, generate Remote MCP Server URL by selecting the community for which the custom connector needs to be set up.

2. Log in to https://claude.ai/login or download and install Claude desktop application from https://claude.ai/download.
3. Navigate to Settings >> Connectors and click on the Add custom connector button.
-1.png?width=670&height=363&name=image%20(2)-1.png)
4. Enter the desired Name for the connector and the Remote MCP Server URL generated in IdeaScale Profile >> Settings >> MCP Server as shown in Step 1. Once done click on the Add button.

5. The new connector will appear in the list. Click on Configure to enable it.
6. Enabled the desired tools to fetch data from the IdeaScale community.

7. You are now ready to begin utilizing the MCP server for your community data access needs.
IdeaScale MCP server with Cursor IDE
Follow the given steps to setup IdeaScale MCP server with Claude:
1. To begin, download and install the Cursor IDE desktop application from https://cursor.com/downloads or go to Cursor IDE https://cursor.com/
2. Sign up or log in to the Cursor application and navigate to Settings >> Tools & Integrations >> MCP Tools.

3. Click on + sign of New MCP Tool to navigate to the JSON field and input the following code that can be found under your IdeaScale Profile >> Settings >> MCP Servers >> Configuration of Cursor IDE. Ensure that you replace the [WORKSPACE_URL] with your specific Workspace URL followed by /mcp (Example: https://ideas.ideascale.com/mcp). Additionally, substitute the [COMMUNITY_API_TOKEN] with the appropriate API token for your community, accessible from IdeaScale Profile >> Settings >> API Tokens (Example: 91d465cf-08b0-4c74-be3f-1539e512925e). For further assistance, please refer to the help article on API tokens.
{
  "mcpServers": {
    "ideascale-mcp": {
      "url": "https://[WORKSPACE_URL]/mcp",
      "headers": {
        "api_token": "[COMMUNITY_API_TOKEN]"
      }
    }
  }
}
4. After adding the code, it will be visible under MCP Tools. You may enable/disable the configuration as well.

6. You are now ready to begin utilizing the MCP tool for your community data access needs.
Once you have completed the setup, navigate to the chat section to start interacting with the MCP server.
OpenWebUI setup
Follow the given steps to setup
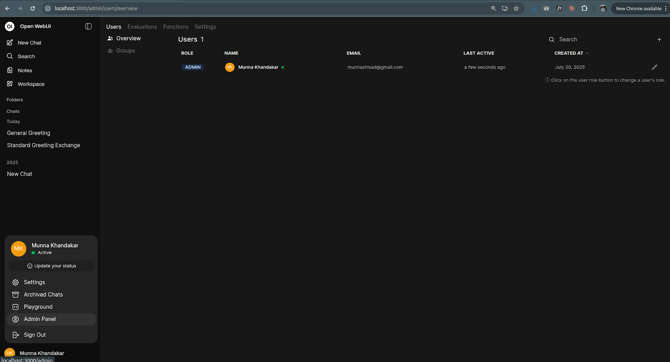
Step 1: Go to Admin Panel
Step 2: Go to the settings and select External Tools
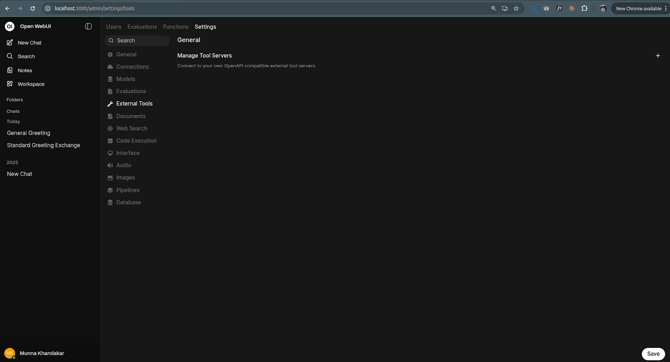
Step 3: Click the ` Add Connection` button and get the MCP tool adding form like below:
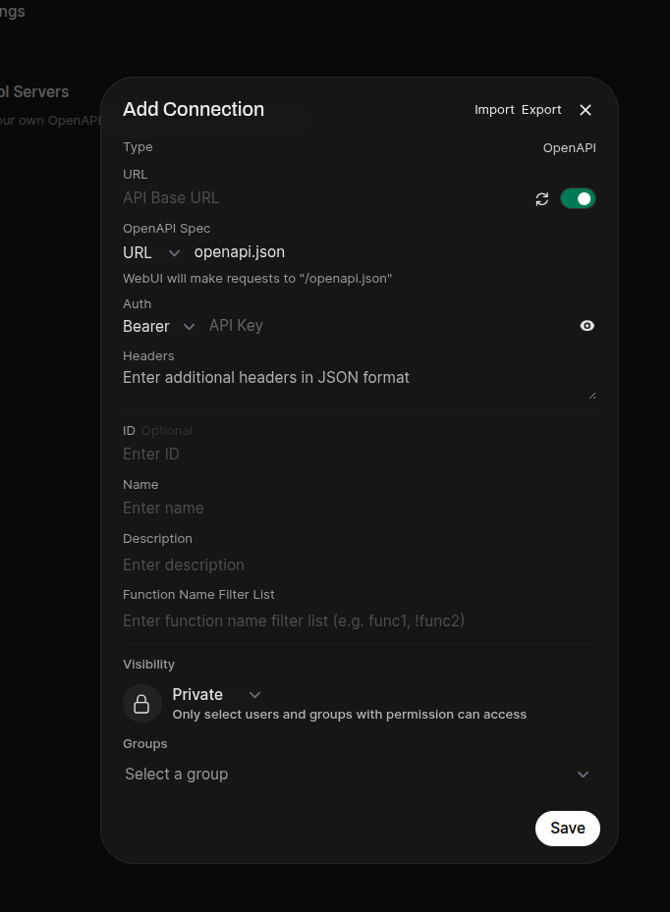
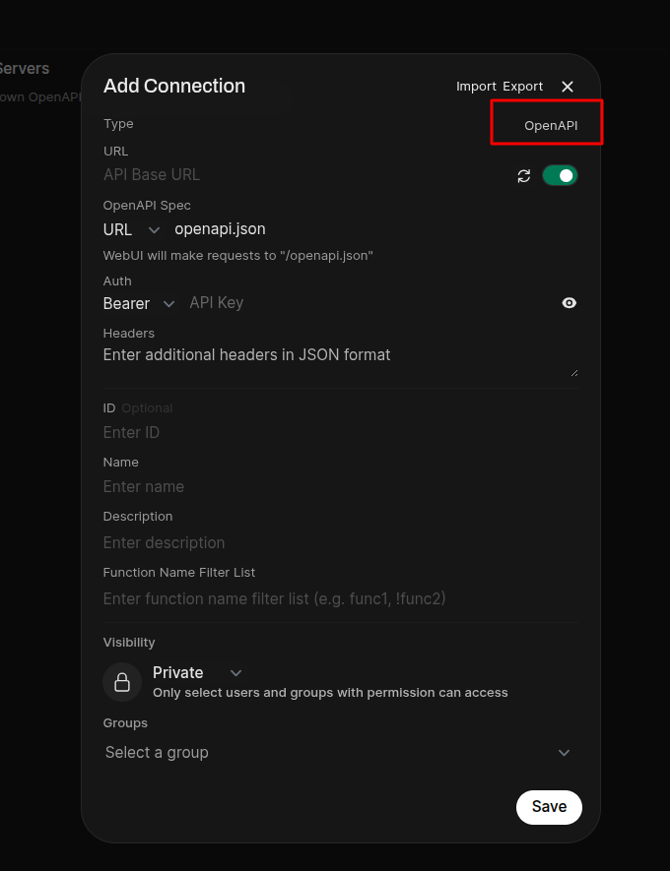
Now click on the OpenAPI and clicking it, MCP Streamable HTTP will be selected
Then fill up the form like below:
Auth is set to None, and the API token is provided in the headers using JSON format.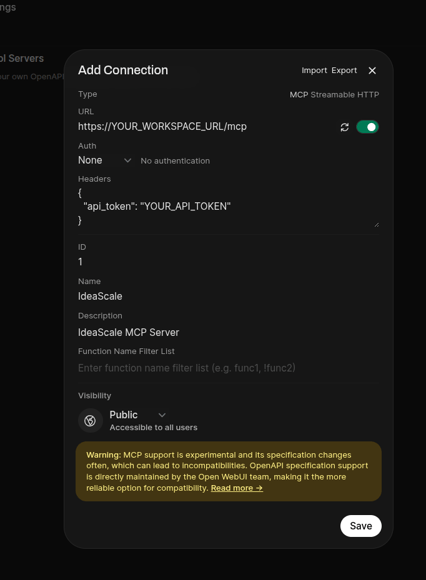
A complete example may look like this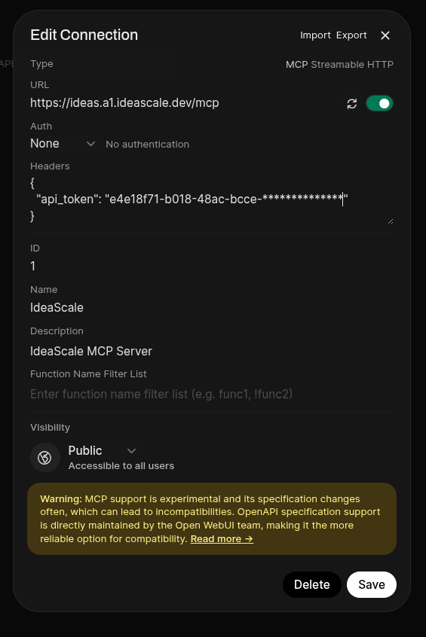
Then save it, after saving you will get confirmation like this:
Now, go to new Chat and add the MCP tools in your chat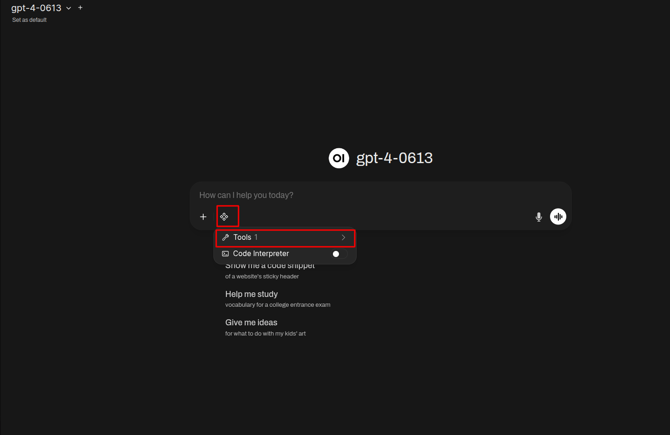
Turn on the IdeaScale like this
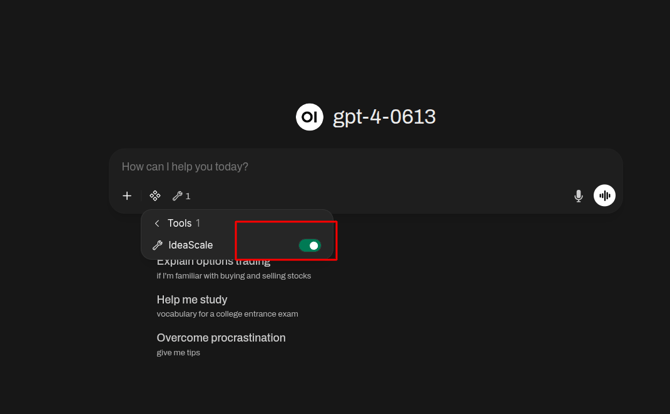
Then you can chat.