
Path: Workspace Homepage >> Navigation Panel >> Settings >> Workspace >> Logs >> Admin Logs
Path: Workspace Homepage >> Navigation Panel >> Settings >> Community >> Logs >> Admin Logs
| What are Admin Logs? |
|---|
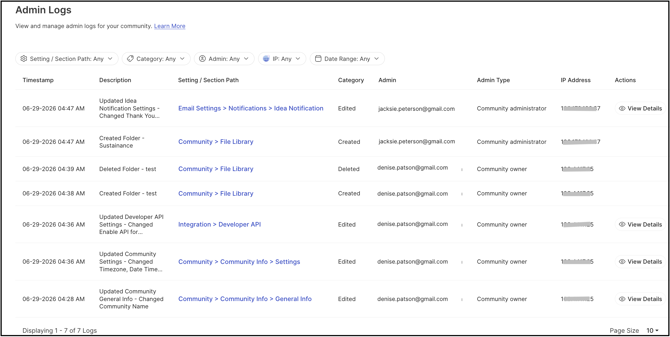
| Admin Logs are a detailed audit trail of every element created, edited, or deleted within the Workspace or Community Settings, depending on the location accessed. |
Administrators can use Admin Logs to monitor configuration changes, track who made them, and review the exact values that were modified.
Role Permissions
- Workspace Administrator: Views the Admin Logs section accessed via Settings >> Workspace >> Logs >> Admin Logs, covering the audit trail of changes made within Workspace Settings.
- Community Administrator: Views the Admin Logs section accessed via Settings >> Community >> Logs >> Admin Logs, covering the audit trail of changes made within Community Settings.
TABLE OF CONTENTS
Log Table
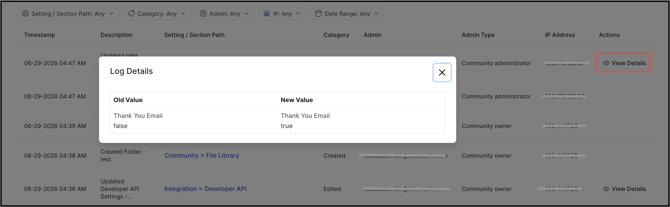
Each entry in the log table captures a comprehensive snapshot of every action performed within the Workspace or Community Settings, depending on the location accessed. The log table includes the following columns:
- Timestamp: The date and time when the action was performed.
- Description: A summary of the setting that was created, updated, or deleted.
- Setting/Section Path: The exact path of the setting that was affected.
- Category: Indicates whether the action was a creation, update, or deletion.
- Admin: The email address of the administrator who performed the action.
- Admin Type: The role type of the administrator who performed the action — Workspace Admin for actions taken at the Workspace level, or Community Owner, Community Admin, or Custom Admin for actions taken at the Community level.
- IP Address: The IP address from which the action was performed.
- Action: A View Details button that displays the old and new values of the setting, wherever applicable.
Filters
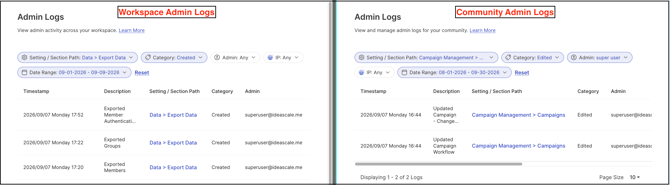
Filters can be applied to narrow down and search for specific log entries. The following filter options are available:
- Settings/Section Path: By default, this filter is set to display all Settings/Section paths. A specific section path can be selected from the dropdown or entered manually in the text field.
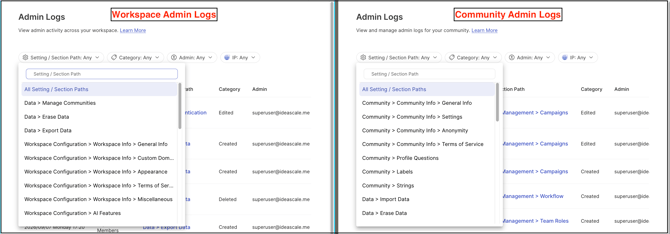
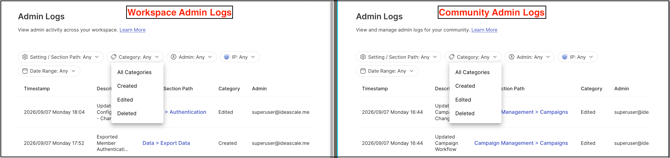
- Category: Filters log entries by action type. All Categories can be selected, or a specific category — Created, Updated, or Deleted.
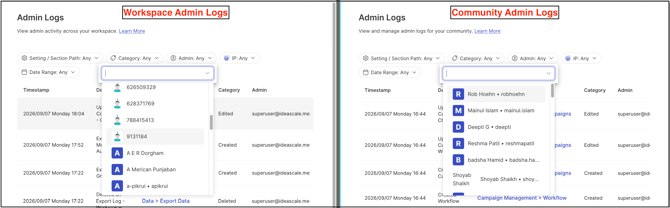
- Admin: Search for a specific administrator who acted by selecting from the dropdown or typing their username directly into the search field.
- IP: An IP address can be entered, followed by pressing Enter, to search for actions performed from that address. See Exceptions below for details on invalid entries.

- Date Range: A start and end date can be selected from the date picker to filter log entries within a specific time period.
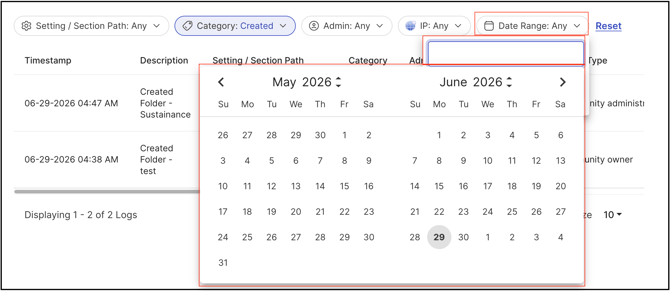
The Reset button will clear all the filters applied.
Exceptions
- Invalid IP Address: An alert message is displayed if an invalid IP address is entered in the IP filter field. Only valid IP address formats are accepted.
Frequently Asked Questions
What actions are captured in the Admin Logs?
Admin Logs capture every element created, updated, or deleted within the Workspace or Community Settings, depending on the location accessed, along with the timestamp, the administrator responsible, and the IP address the action was performed from.
What is displayed when View Details is selected for a log entry?
Selecting View Details displays the old and new values of the setting that was changed, wherever applicable.
What happens if an invalid IP address is entered in the IP filter?
An alert message is displayed. See Exceptions above.
How can all applied filters be cleared at once?
Selecting the Reset button clears every filter currently applied to the log table.
Related Articles